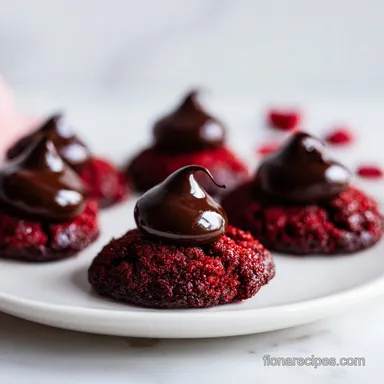
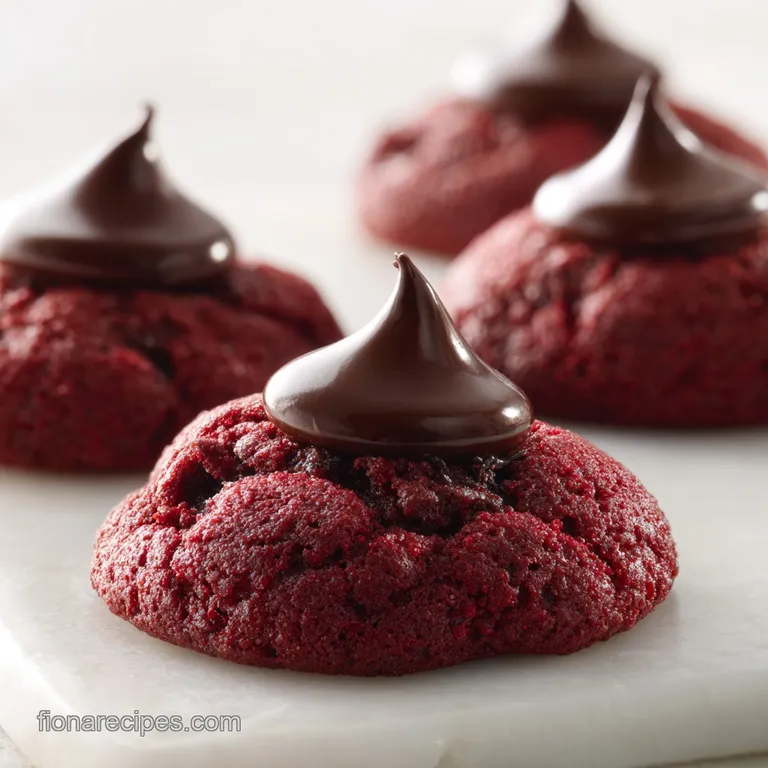
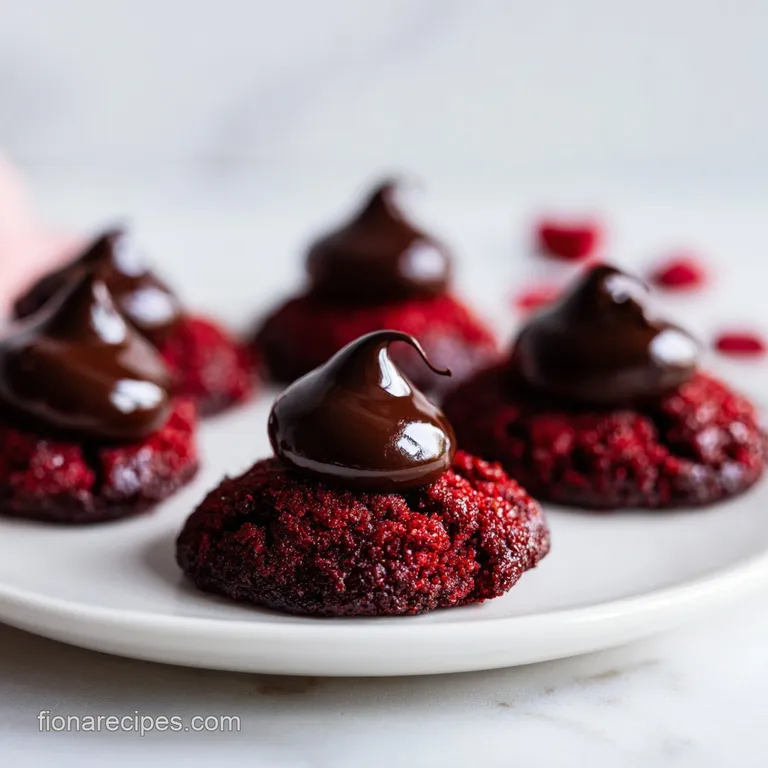
Red Velvet Blossoms Cookies: Velvety and Chewy
- Time:15 minutes active + 10 minutes bake = 25 minutes total
- Flavor/Texture Hook: Velvety, chewy centers with a shatter crisp sugar crust
- Perfect for: Last minute holiday platters or a quick Valentine's treat
The scent of warm cocoa and toasted sugar hitting the air is the first sign that these are working. I remember the first time I tried a version of these; I was convinced that using a box mix was "cheating" and that a from scratch dough was the only way to get a high end result.
I spent an hour measuring cocoa powder and cream of tartar, only to have the cookies spread into thin, oily discs that lacked any structure.
It turns out, the myth that cake mix is inferior for cookies is exactly that - a myth. Box mixes are engineered with specific leavening agents and modified starches that provide a level of stability that's hard to replicate at home without a chemistry degree.
When you treat the mix as a base rather than a shortcut, you get these red velvet blossoms cookies that are consistently chewy and structurally sound.
Trust me on this, the secret isn't in avoiding the box, but in how you handle the fats and the timing of the chocolate. We're looking for a specific contrast: a velvety, almost underbaked center paired with a gritty, crystallized sugar exterior. Let's crack on and get these in the oven.
Red Velvet Blossoms Cookies Guide
To get a result that doesn't taste like a generic store-bought treat, you have to respect the thermodynamics of the oven. Most people overbake these, turning a velvety crumb into something dry and cakey. The goal here is to pull them out the second the edges set, leaving the middle slightly soft.
This ensures the cookie remains fudgy rather than spongy.
The interaction between the granulated sugar and the dough is where the magic happens. The sugar doesn't just add sweetness; it creates a hygroscopic barrier. This means it draws moisture from the surface of the dough during the first few minutes of baking, resulting in that signature shatter crisp exterior.
If you skip the sugar roll, you lose that textural contrast.
Finally, the "blossom" effect depends entirely on the temperature of the cookie when the chocolate is added. If the cookie is too cold, the chocolate sits on top like a pebble. If it's too hot, the chocolate melts into a puddle.
You want a precise window of heat to create a slight depression that anchors the chocolate without liquefying it.
Avoid Common Baking Errors
The Over Mixing Trap: Once you add the cake mix to the wet ingredients, stop as soon as the flour streaks disappear. Over mixing develops the gluten in the wheat flour, which transforms a velvety cookie into a tough, bread like disc. Keep it low and slow.
Neglecting the Temperature: Your butter must be "softened," not melted. Melted butter changes the emulsion of the dough, leading to excessive spreading. According to guidelines from King Arthur Baking, properly softened butter should yield to pressure but still hold its shape, ensuring the air bubbles created during mixing stay trapped in the dough.
The Timing of the "Kiss": Many people wait for the cookies to cool before adding the chocolate. This is a mistake. The chocolate must be pressed in immediately to create a seal with the hot dough.
Comparison: Baking vs. Stovetop
| Method | Time | Texture | Best For |
|---|---|---|---|
| Oven Baked | 10 mins | Chewy & Structured | Classic Blossoms |
| Stovetop Fudge | 15 mins | Dense & Silky | Richer, No Bake Treats |
Technical Breakdown and Specs
Understanding how the ingredients interact helps you avoid failure. We aren't just mixing things; we're managing starch gelatinization and protein denaturation.
Ingredient Deep Dive
| Ingredient | Science Role | Pro Secret |
|---|---|---|
| Red Velvet Mix | Structure/Leavening | Provides modified starch for stability |
| Unsalted Butter | Fat/Tenderizer | Keeps the crumb velvety and moist |
| Large Egg | Binder/Emulsifier | Bridges the fat and water for a smooth dough |
The stability of this recipe comes from the ratio of fats to the pre mixed flour. Because the cake mix already contains a precise amount of leavening, adding too much extra fat (like using melted butter) would collapse the cell structure of the cookie.
Required Ingredients and Swaps
Stick to these measurements for a foolproof result. If you're craving something different, you can use the substitutions below, but be mindful of how they change the final bite.
- 1 box (15.25 oz) red velvet cake mix Why this? Standardized leavening for consistent rise
- 1/2 cup unsalted butter, softened Why this? Pure fat for a velvety mouthfeel
- 1 large egg Why this? Provides structure and lift
- 1/3 cup granulated sugar Why this? Creates the outer crust
- 24 Hershey's Kisses Why this? High cocoa butter for a smooth melt
Substitution Table
| Original Ingredient | Substitute | Why It Works |
|---|---|---|
| Unsalted Butter | Coconut Oil (1/2 cup) | Similar fat content. Note: Adds a subtle tropical note |
| Large Egg | Applesauce (1/4 cup) | Acts as a binder. Note: Results in a denser, moister crumb |
| Granulated Sugar | Coconut Sugar (1/3 cup) | Similar grain size. Note: Earthy flavor and darker crust |
If you find yourself with extra time and want to explore different textures, you might enjoy my Cookie Dough for 4 recipe for a treat that requires zero oven time.
Essential Baking Tools
You don't need a professional kitchen, but a few specific tools make this process much smoother.
- Large Mixing Bowl: Essential for incorporating the mix without spilling.
- Hand Mixer or Stand Mixer: A KitchenAid is great, but a hand mixer works fine on low speed.
- Parchment Paper or Silicone Mat: Critical to prevent the bottoms from scorching.
- Tablespoon Scoop: Ensures every cookie is the exact same size for even baking.
Step-by-step Baking Process
Right then, let's get into the actual work. Follow these steps precisely to ensure your batch is consistent.
Phase 1: Preparing the Base
- Preheat your oven to 350°F (175°C). Note: Ensure the rack is in the center for even airflow
- In a large mixing bowl, combine the red velvet cake mix, softened butter, and egg.
- Mix on low speed until the flour streaks just disappear. Note: Do not over mix or the cookies will be tough
Phase 2: Shaping and Coating
- Line a baking sheet with parchment paper or a silicone baking mat.
- Scoop about 1 tablespoon of dough and roll it between your palms to create a smooth sphere.
- Roll each dough ball in granulated sugar until evenly coated.
- Place the sugar coated balls 2 inches apart on the prepared baking sheet.
Phase 3: Baking and Finishing
- Bake for 8–10 minutes until the edges are set but the centers remain slightly soft.
- Immediately upon removing from the oven, press one chocolate kiss firmly into the center of each cookie.
- Let the cookies cool on the pan for 5 minutes before moving.
Fixing Common Texture Issues
Most problems with this recipe stem from temperature control. If your kitchen is too hot, the butter will soften too much, and the dough will behave like a liquid.
Why Your Cookies Spread Too Much
This usually happens when the butter is too warm or the oven isn't fully preheated. When the fat melts before the flour structure sets, the cookie flattens.
The Chocolate Kiss is Sliding Off
If the cookie has cooled too much, the chocolate won't "grip" the surface. You need to press the chocolate in while the center is still steaming.
The Dough is Too Sticky to Roll
This is often a result of over mixing or using eggs that are too large. A quick chill in the fridge for 15 minutes usually fixes this.
Troubleshooting Table
| Problem | Root Cause | Solution |
|---|---|---|
| Flat cookies | Butter too soft | Chill dough for 15 mins before baking |
| Loose chocolate | Cookie cooled too fast | Press Kiss in within 30 seconds of removal |
| Dry/Cakey texture | Overbaked | Pull from oven at 8 minutes |
Common Mistakes Checklist
- ✓ Checked that butter is softened, not melted
- ✓ Stopped mixing as soon as flour disappeared
- ✓ Used parchment paper to prevent sticking
- ✓ Pressed chocolate in immediately after baking
- ✓ Allowed cookies to set on the pan for 5 mins
Customizing Your Batch
Once you've mastered the base, you can start playing with the flavors. For those who want a smaller treat, I often recommend trying an edible cookie dough for one when you don't want to fire up the oven.
Flavor Twists - Orange Zest: Add 1 teaspoon of fresh orange zest to the dough for a citrusy contrast to the cocoa. - Sea Salt: Sprinkle a tiny pinch of flaky sea salt on top of the chocolate kiss for a gourmet finish.
Diet Swaps - dairy-free: Use a plant based butter stick (ensure it's a stick, not a tub spread) for the same structure. - Less Sweet: Reduce the rolling sugar to 2 tablespoons, though you'll lose some of that shatter crisp crust.
Storage and Waste Tips
These cookies hold up remarkably well because of the sugar coating, which acts as a preservative for the moisture inside.
Storage Guidelines
- Fridge: Store in an airtight container for up to 5 days.
- Freezer: Flash freeze on a tray for 1 hour, then move to a freezer bag for up to 3 months.
- Reheating: Pop a frozen cookie in the microwave for 10 seconds to bring back that velvety center.
Zero Waste Tips If you have leftover red velvet cake mix in the box, don't toss it. You can toast the dry mix in a pan with a little butter and cinnamon to create a red velvet crumble for topping yogurt or ice cream.
Best Ways to Serve
To really showcase these, serve them on a white platter to make the deep red color pop. They pair brilliantly with a glass of cold milk or a sharp espresso, which cuts through the richness of the chocolate.
For a party, arrange them in a pyramid shape and dust the entire pile with a light coating of powdered sugar for a snowy, festive look.
Recipe FAQs
Why are they called blossom cookies?
They resemble blooming flowers. The heat causes the dough to crack and spread during baking, creating a petal like appearance around the chocolate center.
Can I freeze these cookies?
Yes, they freeze exceptionally well. Flash freeze them on a tray for one hour before transferring them to a freezer bag for up to three months.
How to store red velvet blossoms to keep them soft?
Place them in an airtight container. Store them in the fridge for up to 5 days to maintain the moisture trapped by the sugar coating.
How to reheat frozen cookies?
Microwave for 10 seconds. This quick burst of heat restores the velvety, soft center without melting the chocolate kiss.
Why did my cookies spread too much?
You likely overmixed the dough or used butter that was too soft. Mix on low speed just until the flour streaks disappear to prevent the cookies from flattening.
How to get the perfect chocolate center?
Press one chocolate kiss firmly into the center immediately after baking. Doing this while the cookies are hot ensures the chocolate adheres without melting completely.
Can I make these with other cake mixes?
Yes, most cake mixes work with this ratio. If you enjoyed mastering the dough consistency here, see how the same principle works in our classic butter sugar cookies.
Red Velvet Blossoms Cookies