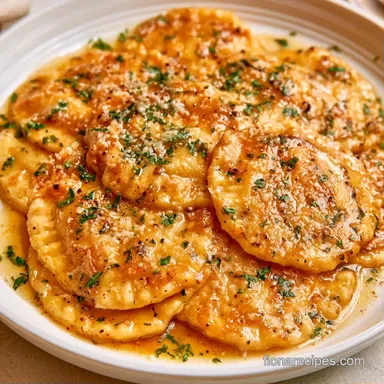
Hearty Homemade Meat Ravioli

- Total Time: 40 min active + 30 min resting
- Sensory Profile: Hearty beef center with a smooth, tender wrap
- Best for: Hearty family dinners or a cozy weekend project
The scent of searing beef and garlic in a hot pan always brings back memories of my first attempt at handmade pasta. I recall flour dusting every inch of the kitchen like a winter storm and the pure joy of seeing those tiny pockets bob to the surface of the boiling water.
It brings a wonderful sense of warmth and welcome to the entire house.
For years, I convinced myself that a pricey machine was the only way to achieve that thin, professional finish. I spent far too long struggling with dough that kept springing back like a rubber band. But everything clicked once I stopped rushing the process.
You don't need fancy tools; just a rolling pin and some patience will do.
This version of Meat Ravioli is all about pure comfort. It doesn't need to be fancy or intricate it's just honest, filling food. We use a simple beef and ricotta mixture that evokes a classic Sunday dinner, wrapped in a fresh dough that puts frozen alternatives to shame.
Meat Ravioli
Dough Resting: Giving the pasta 30 minutes to sit lets the gluten relax. This means you can roll it thin without it shrinking back, which is the only way to get a tender bite.
Cooling the Filling: Adding hot meat to raw dough creates steam. That steam creates air bubbles and softens the dough too much, which usually leads to the ravioli bursting in the pot.
The Egg Bind: Using a mix of eggs in the dough and the filling ensures everything stays together. It prevents the meat from crumbling out of the pasta during the boil.
Timing and Yield Basics
The workflow for this dish is straightforward if you plan it right. You'll spend about 40 minutes on the active work, but the total time is 75 minutes because the dough needs its nap.
This recipe makes 20 ravioli, which is usually enough for a family of four if you serve them with a side of greens.
| Method | Time | Texture | Best For |
|---|---|---|---|
| Stovetop | 5 min boil | Tender and soft | Classic pasta feel |
| Oven | 20 min bake | Toasted edges | Cheesy bakes |
If you're planning this for a crowd, remember that you can't rush the 30 minute rest. If you try to roll the dough immediately, you'll spend twenty minutes fighting the elasticity, and the pasta will be tough.
What Goes Into the Dish
For the dough, we use all purpose flour. Some people suggest "00" flour, but for a hearty Meat Ravioli, standard flour gives a great structure. If you're just looking for the base, check my ravioli dough guide for more tips on flour brands.
The filling relies on lean ground beef. Using something too fatty can make the filling greasy, which causes the pasta to slide off the meat. Ricotta provides the creaminess, while Parmesan adds the salty punch.
For the Dough:
- 2 cups (250g) all purpose flourWhy this? Provides the structure and strength for the pockets
- 3 large (150g) eggsWhy this? Binds the flour and adds richness
- 1/2 tsp (3g) fine sea saltWhy this? Basic seasoning for the pasta wrap
- 1 tbsp (15ml) extra virgin olive oilWhy this? Makes the dough more pliable
For the Filling:
- 1 lb (450g) lean ground beefWhy this? The hearty base of the Meat Ravioli
- 1/2 cup (60g) yellow onion, finely dicedWhy this? Adds sweetness and depth
- 2 cloves (6g) garlic, mincedWhy this? Pungent aroma and flavor
- 1/2 cup (115g) whole milk ricotta cheeseWhy this? Creates a creamy, soft texture
- 1/2 cup (50g) grated Parmesan cheeseWhy this? Adds salty, nutty notes
- 1 egg (50g), lightly beatenWhy this? Holds the filling together
- 1/4 cup (15g) fresh parsley, choppedWhy this? Freshness to cut through the richness
- 1/2 tsp (1g) ground nutmegWhy this? Classic Italian flavor for meat and cheese
- 1 tsp (5g) saltWhy this? Enhances the beef flavor
- 1/2 tsp (2g) black pepperWhy this? Adds a slight heat
- 1 tbsp (15ml) olive oilWhy this? For browning the beef
Quick Substitutions:
- Lean Beef: Ground turkey or pork works well, though it's slightly milder.
- Ricotta: Cottage cheese (blended smooth) is a good alternative.
- Parmesan: Pecorino Romano adds a sharper, saltier taste.
Tools for the Job
Making Meat Ravioli doesn't require any specialized equipment. All you really need is a clean workspace. A rolling pin is ideal, but a smooth wine bottle is a handy substitute.
For the beef, grab a large skillet. I recommend cast iron or stainless steel since their heat retention encourages browning rather than steaming. When it comes to boiling, choose your largest pot; fresh ravioli requires plenty of space to avoid clumping and tearing.
While a pasta machine is helpful for rolling the dough, doing it by hand is just as good. Simply use a fork for mixing and a knife or fluted cutter to create the squares.
Step-by-step Cooking Process
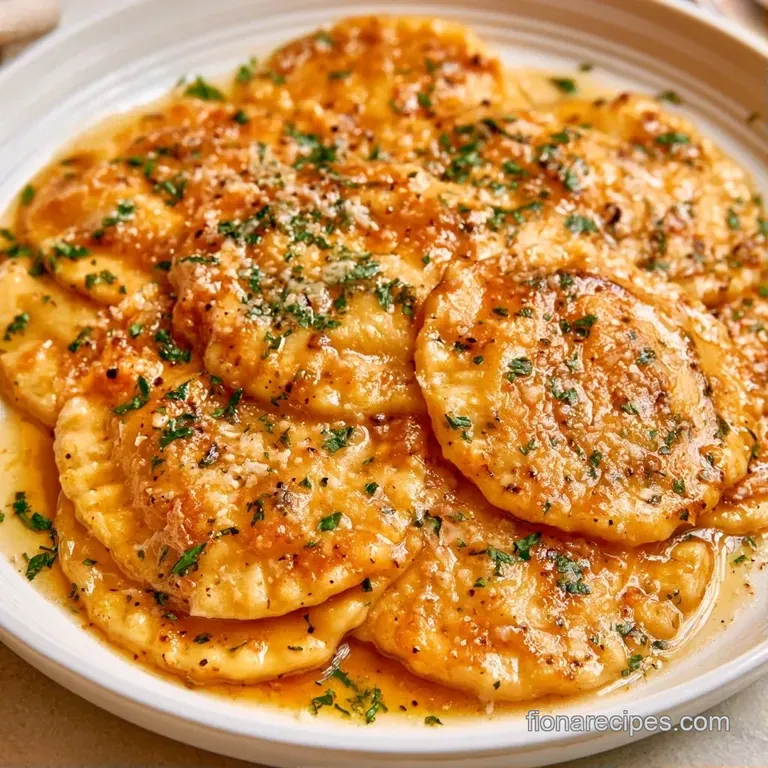
Time to dive in. I prefer prepping the dough first so it can sit while I handle the meat.
Phase 1: Preparing the Pasta Dough
- Mound flour on a clean work surface, forming a wide well in the center.
- Crack the eggs into the hole and add salt and olive oil. Gently whisk with a fork, slowly incorporating flour from the inner edges. Note: Be careful not to break the "wall" too soon, or the eggs will leak across the counter.
- Knead the dough by hand for 8-10 minutes until the consistency is smooth, elastic, and springs back when poked.
- Wrap the dough tightly in plastic and let it rest at room temperature for 30 minutes.
Phase 2: Cooking the Savory Meat Filling
- Set a pan to medium high heat and add olive oil. Cook the ground beef until it is thoroughly browned and a deep mahogany.
- Stir in the garlic and diced onion, sautéing until the onion is soft and translucent.
- Take the pan off the heat and let the meat cool completely. Fold in the ricotta, Parmesan, beaten egg, parsley, nutmeg, salt, and black pepper. Note: Cooling the filling prevents the dough from steaming and ripping.
Phase 3: Shaping the Ravioli
- Use a rolling pin or pasta machine to roll the rested dough into thin sheets.
- Spoon small amounts of filling onto the pasta, cover with a second sheet, and seal the edges with egg wash or water. Note: Press out all air bubbles from the center toward the edges.
- Cut into squares and boil in a large pot of salted water for roughly 5 minutes until they float to the top.
Chef's Tip: To keep your area clean, keep a small bowl of flour nearby for dusting your hands and the rolling pin. This stops the dough from sticking to the surface.
Avoiding Common Pasta Problems
The most frustrating part of making Meat Ravioli is when they burst in the water. This usually happens because of trapped air. When you lay the second sheet of dough over the filling, use your fingers to press firmly from the center outward. This pushes the air to the edges so the pocket is tight.
If your dough feels too dry and won't come together, don't panic. Just wet your hands and knead it for another minute. You don't want to pour water directly onto the dough, as that can make it gummy.
Dealing with a runny filling is another common issue. This usually happens if the ricotta is too wet. If you notice the filling is too loose, stir in an extra tablespoon of Parmesan or a teaspoon of breadcrumbs to soak up the moisture.
Fixing Bursting Pasta
If the ravioli open up during the boil, it's usually a seal issue. Make sure you're using a bit of water or egg wash on the edges to glue them shut.
Dealing with Sticky Dough
When the dough sticks to the pin, you aren't using enough flour. Dust every few rolls to keep the surface smooth.
Fixing Runny Filling
If the mixture is too wet, the pasta will get soggy. Drain your ricotta in a fine mesh sieve for 15 minutes before using it.
| Problem | Fix |
|---|---|
| Ravioli burst in pot | Press air out before sealing |
| Dough is too tough | Let it rest for 30 mins minimum |
| Filling is too wet | Add more Parmesan or drain ricotta |
| Pasta sticks together | Use a very large pot of water |
Flavor Twist Ideas
Once you've got the hang of the Meat Ravioli process, you can change the profile easily. For a spicy Italian twist, add a pinch of red pepper flakes to the beef and swap the parsley for fresh basil.
If you want something more earthy, add a teaspoon of dried oregano or some finely chopped mushrooms to the meat mixture. The mushrooms add an umami depth that makes the beef taste even richer. For a lighter option, you can use ground turkey and substitute the ricotta with a blend of goat cheese and lemon zest.
If you're wondering what to serve these , I highly recommend a ravioli tomato sauce for a classic feel. If you prefer something more indulgent, a garlic cream sauce is the way to go.
Decision Shortcut:
- For a thinner wrap: roll dough until it's almost translucent.
- For a richer center: add another 1/4 cup of Parmesan.
- For a firmer bite: chill the filling for 1 hour before stuffing.
Storing Your Pasta
Fresh Meat Ravioli have a limited shelf life, so proper storage is key. If you won't enjoy them immediately, they'll stay fresh in the refrigerator for around 2 days. To prevent sticking, dust them with flour and arrange them spaced apart on a tray.
After they've chilled and firmed up, transfer them to a sealed container.
For a more permanent solution, try the freezer. Follow the same tray technique flash freeze them for 2 hours. This ensures the ravioli don't stick together in one mass. Then, simply transfer them into a freezer safe bag. They will remain high quality for about 3 months.
To prepare frozen Meat Ravioli, skip the thawing process. Place them directly into boiling water. Just allow an additional minute or two of boiling time compared to fresh pasta.
Zero Waste Tip: Instead of discarding leftover dough, roll it thin and slice it into wide ribbons to create homemade pappardelle for a future dinner.
Plating and Serving
Your choice of accompaniment can really set the mood for the meal. A timeless option is a brown butter and sage sauce; simply brown the butter until it reaches a golden hue and nutty aroma, then fry fresh sage leaves until they are crisp.
For a more robust meal, try a slow simmered marinara. Just ensure the sauce isn't too heavy, as you don't want to mask the flavor of the fresh pasta. I recommend finishing the plate with a dusting of fresh Parmesan and some chopped parsley.
For a family style dinner, transfer the boiled ravioli to a baking dish, top them with mozzarella and a bit of sauce, and broil for 3 minutes. This creates the bubbly, golden edges that children absolutely love.
Remember to save a small cup of the pasta water before draining. If the sauce is too thick, a splash of this starchy liquid will help it coat the Meat Ravioli perfectly.
To maintain food safety, check the internal temperature of the beef while browning. Even though they are cooked again during the boil, USDA guidelines state that ground beef should hit 160°F to be fully safe.
You are now all set to bring these to the table. Although it takes more effort than using a box, the taste of handmade Meat Ravioli is unmatched. Enjoy the process, get some flour on your hands, and dig in.
Recipe FAQs
Do you cook the meat before putting it in ravioli?
Yes, you must brown the ground beef in a skillet first.
Tip: Let the filling cool completely before mixing with ricotta to prevent the cheese from melting.
What is the best meat for the filling?
Lean ground beef is the ideal choice for this recipe.
Tip: If you prefer a different protein, the same browning technique used in tender meatloaf ensures a rich flavor.
Which common mistakes should be avoided?
Overfilling the pasta squares often leads to seals bursting during boiling.
Tip: Use a small amount of water or egg wash on the edges to ensure a tight seal.
How to use leftover pasta dough?
Roll it into thin sheets and cut into noodles.
Tip: Dust them with flour and freeze in a single layer before bagging to avoid sticking.
Is it true that resting the dough is optional?
No, this is a common misconception.
Tip: Resting for 30 minutes relaxes the gluten, making the dough much easier to roll thin.
Homemade Meat Ravioli