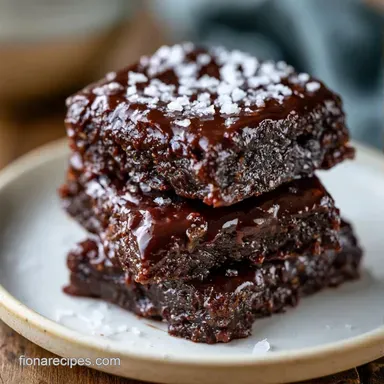
Healthy Vegan Chocolate Date Bars
- Time: 10 min active + 20 min chilling
- Flavor/Texture Hook: Dense, chewy base with a snappy chocolate top
- Perfect for: Quick energy snacks or a healthy dessert
The smell of melting dark chocolate always hits me first, followed by that distinct, honey like aroma of Medjool dates. I remember the first time I tried making a "healthy" treat like this.
I skipped the coconut oil in the chocolate and ended up with a top layer so brittle it shattered into a hundred pieces the second I tried to slice it. It was a mess, but it taught me that a little bit of fat makes the difference between a snack and a struggle.
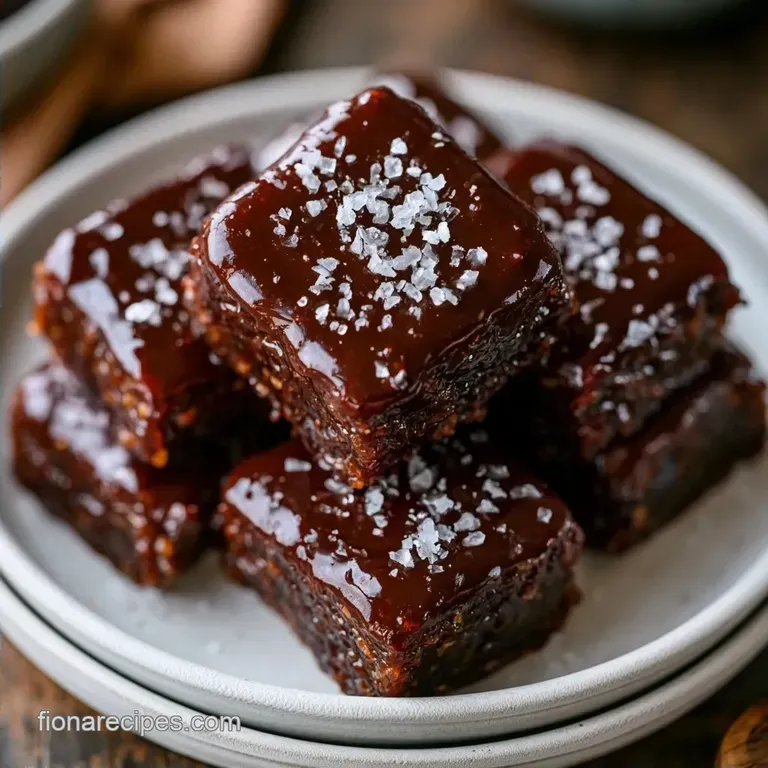
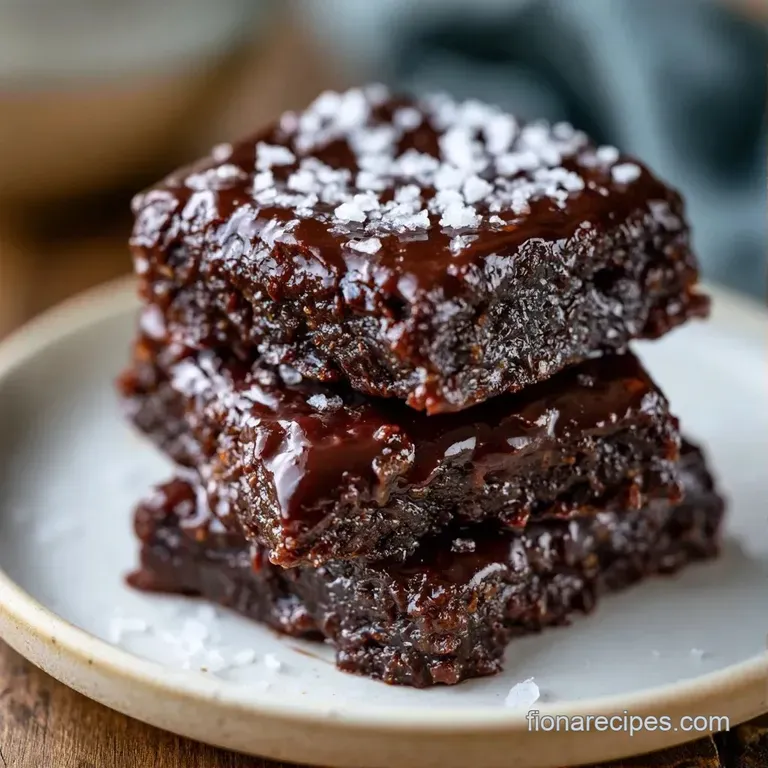
Making these Chocolate Date Bars is more about assembly than actual cooking. You aren't dealing with oven temperatures or rising agents, which makes it a relaxing process. I love how the salt cuts through the richness of the cocoa, leaving you with something that feels like a candy bar but uses actual fruit for the bulk of the sweetness.
You can expect a treat that is heavy and satisfying. It isn't a light, airy cake, but rather a concentrated burst of energy. Trust me on this, once you get the pressing technique down, these become the easiest thing to keep in your freezer for those mid afternoon cravings.
Easy Homemade Chocolate Date Bars
The logic here is simple. We use the natural stickiness of dates to hold everything together. Instead of using flour and eggs, the fruit paste creates a structural base that supports the chocolate.
Natural Sugars: The dates act as the binder, so you don't need added thickeners. Fat Ratio: Adding coconut oil to the chocolate lowers the melting point. This ensures the top doesn't crack when you bite into your Chocolate Date Bars.
| Method | Time | Texture | Best For |
|---|---|---|---|
| No Bake | 45 mins | Chewy & Dense | Quick snacks |
| Baked | 2 hours | Cakey & Soft | Traditional dessert |
Right then, let's look at why these specific ingredients make the cut. Most people just throw things in a blender, but the ratios actually matter for the set.
The Logic Behind the Texture
| Ingredient | What It Does | Best Swap |
|---|---|---|
| Medjool Dates | Provides the sticky bind | Deglet Noor (use more syrup) |
| Raw Almonds | Adds structure and crunch | Walnuts or Cashews |
| Coconut Oil | Prevents chocolate cracking | Cocoa butter |
If you've ever noticed that some Vegan Chocolate Date Bars feel too dry, it's usually because the dates weren't moist enough. Medjools are the gold standard here because they are naturally softer.
Essential Pantry Items
- 1 cup (150g) Medjool dates, pitted Why this? Higher moisture and softer texture than other dates
- 1/2 cup (65g) Raw almonds Why this? Mild flavor that doesn't overpower the chocolate
- 1 tbsp (15ml) Maple syrup Why this? Adds a hint of caramel depth
- 1/4 tsp (1.5g) Sea salt Why this? Cuts through the sweetness
- 3/4 cup (120g) Vegan dark chocolate chips Why this? Stable fat content for a clean set
- 1 tbsp (15ml) Coconut oil, melted Why this? Keeps the chocolate from getting too hard
| Original Ingredient | Substitute | Why It Works |
|---|---|---|
| Raw Almonds | Walnuts | Similar fat content. Note: Adds a slightly bitter, earthier tone |
| Maple Syrup | Agave | Similar viscosity. Note: Slightly more neutral flavor |
| Dark Chocolate | Milk Chocolate | Same structure. Note: Much sweeter, less "snappy" finish |
Since we aren't using a stove for the base, the quality of your dates is everything. If you find your dates are a bit firm, soak them in warm water for 10 minutes and pat them dry before starting.
The Required Tools
You don't need a professional kitchen for this, but a few specific tools make it faster. A food processor is non negotiable because doing this by hand with a mortar and pestle would take an hour.
I also recommend a small 8x4 inch loaf pan. If you use a pan that is too large, the base will be too thin, and your bars will feel more like thin wafers than substantial snacks. For the chocolate, a microwave safe bowl or a double boiler works.
Step by step Method
Phase 1: Creating the Base
- Place the pitted dates and raw almonds into a food processor. Pulse until nuts are finely ground, then blend on high until a sticky, uniform dough forms. Note: This usually takes about 2-3 minutes.
- Add sea salt and maple syrup to the processor. Pulse until the mixture is cohesive and the salt is evenly distributed.
Phase 2: Shaping and Compressing
- Line an 8x4 inch loaf pan with parchment paper. Transfer the date mixture into the pan and press down firmly with a spoon or palms until the surface is completely flat. Note: Use the back of a metal spoon for a really smooth finish.
Phase 3: The Chocolate Enrobing
- Melt vegan dark chocolate and coconut oil using a double boiler or microwave in 30 second bursts. Stir until the mixture is glossy and no lumps remain. Coconut oil helps the chocolate stay fluid at slightly higher temperatures, as explained by Serious Eats regarding fat content in coatings.
- Pour the melted chocolate over the pressed date base. Spread it evenly with a spatula until the edges are completely sealed.
Phase 4: The Final Set
- Transfer the pan to the freezer for 20 minutes until the chocolate is firm and matte.
- Lift the parchment paper out of the pan. Use a sharp knife to slice into 6 even bars.
Fixing Common Issues
If you're new to no bake treats, a few things might go sideways. Usually, it comes down to the moisture levels of the dates or the temperature of the chocolate.
If the Date Mixture is Too Sticky
This happens if your dates are exceptionally ripe. The mixture won't hold its shape and will feel more like a paste than a dough. Adding another tablespoon of ground almonds usually fixes this.
If the Chocolate Cracks When Cutting
This is a sign that the chocolate was too cold or lacked enough fat. Using a slightly warm knife (dip it in hot water and wipe it dry) helps the blade glide through the chocolate without shattering it.
If Your Dates Are Too Dry
Dry dates won't bind with the nuts, leaving you with a crumbly base that falls apart. A quick soak in warm water for 10 minutes softens the fibers and makes the dough stick together.
| Problem | Root Cause | Solution |
|---|---|---|
| Base is crumbly | Dry dates | Soak dates in warm water |
| Chocolate is dull | Seized chocolate | Stir in 1 tsp extra coconut oil |
| Bars are too soft | Not chilled enough | Freeze for an extra 10 mins |
Creative Flavor Variations
Once you've nailed the basic version, you can start swapping things out. If you want something without the chocolate, my no bake vegan date bars are a great alternative for a lighter snack.
For a tropical twist, try adding 2 tablespoons of shredded coconut to the date base. This makes Vegan Chocolate Coconut Date Bars that taste like a fancy candy bar. If you need a nut free version, swap the almonds for toasted sunflower seeds or pumpkin seeds.
For those wanting more protein, you can blend in a scoop of vanilla pea protein. Just be careful, as protein powder absorbs moisture, so you'll likely need an extra teaspoon of maple syrup to keep the base from becoming too dry.
Storing Your Bars
These are best kept cold. Because they don't have preservatives, they can get a bit soft if left on the counter in a warm room.
In the Refrigerator: Store them in an airtight container for up to 1 week. They stay chewy and the chocolate remains snappy. In the Freezer: These last about 3 months in the freezer. I actually prefer them frozen, as they feel more like a frozen dessert.
To avoid waste, if you have a few date pits left over, don't toss them. You can roast them in the oven at 180°C until they smell like coffee, then grind them up for a caffeine free date seed brew.
Best Ways to Serve
These are great on their own, but they really shine when paired with a drink. They go great with a mug of date hot chocolate on a rainy afternoon.
If you're putting together a dessert platter, slice them into smaller bite sized squares. Surround them with fresh raspberries and sliced pears to balance the richness of the cocoa. The tartness of the berries cuts through the density of the Chocolate Date Bars, making the whole plate feel lighter.
Honestly, just keep a few in the freezer and grab one whenever you need a quick hit of energy. It's a solid way to satisfy a sweet tooth without feeling weighed down. Enjoy your homemade Chocolate Date Bars!
Recipe FAQs
Can I use a different nut instead of raw almonds?
Yes, most raw nuts work well. If you enjoyed the process of blending raw ingredients into a cohesive base here, see how a similar texture is achieved in our cottage cheese cookie dough.
How to melt the vegan dark chocolate and coconut oil?
Use a double boiler or microwave in 30-second bursts. Stir the mixture frequently between intervals until it is completely glossy and smooth.
Is it true that the bars only stay firm if kept in the freezer?
No, this is a common misconception. They remain chewy and snappy in the refrigerator for up to one week, though the freezer is ideal for a frozen dessert feel.
How to store the bars to maintain their texture?
Keep them in an airtight container in the refrigerator or freezer. These can soften if left on a warm counter because they contain no preservatives.
Can I use milk chocolate instead of vegan dark chocolate chips?
Yes, though it changes the flavor profile. Using milk chocolate will make the bars significantly sweeter, losing the bitter contrast provided by the dark chocolate.
Why is my date and almond mixture not forming a sticky dough?
Blend the mixture on high for a longer duration. Ensure you are using Medjool dates, as their specific moisture content is what creates the sticky consistency.
How to ensure the chocolate layer is even and sealed?
Pour the melted chocolate over the pressed base and spread with a spatula. Press the chocolate against the sides of the pan to seal the edges completely.
Vegan Chocolate Date Bars