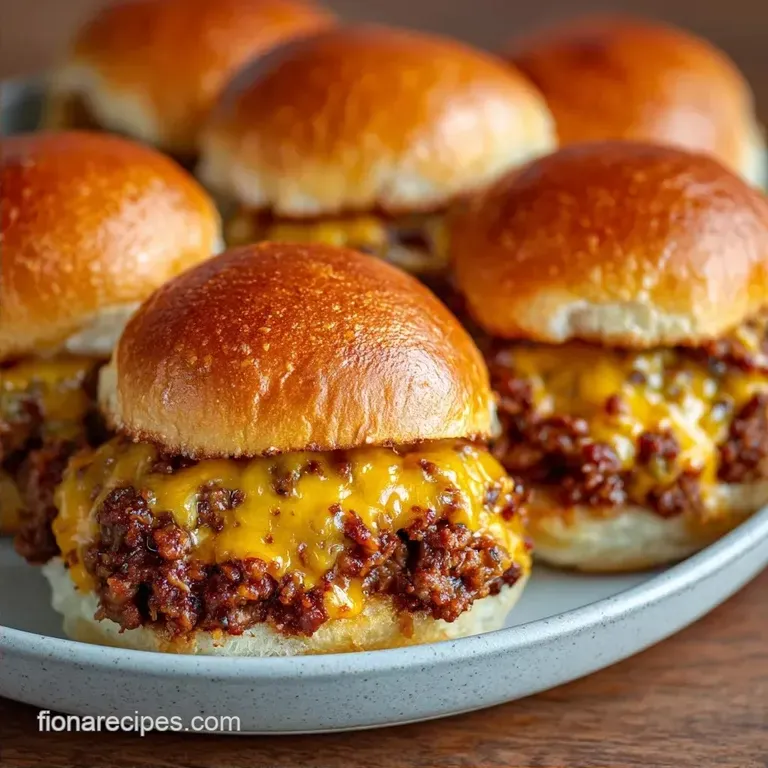
Cheesy Beef Sliders: Gooey and Buttery
- Time: 10 min active + 20 min bake
- Flavor/Texture Hook: Gooey melted cheese and buttery, garlic toasted buns
- Perfect for: Game day, kid friendly dinners, or quick party appetizers
The sound of ground beef hitting a hot skillet - that aggressive sizzle - is the sound of a dinner that actually tastes like a reward. For a long time, I thought making sliders meant spending an hour shaping tiny, identical patties that always shrunk or stuck to the pan.
It felt like too much work for something that gets eaten in three bites.
But here is the secret: you don't need individual patties. Forget everything you know about the "burger" part of the slider. When you crumble the meat into a savory base, you get more surface area for seasoning and a much easier assembly process.
This is how you get Cheesy Beef Sliders that stay juicy without the stress of flipping twelve tiny burgers.
Expect a meal that is salty, slightly sweet from the rolls, and incredibly rich. We are talking about the kind of comfort food that makes everyone in the room go quiet for a few minutes. It is a straightforward process, but the magic is in the layering and that garlic butter finish.
The Appeal of Cheesy Beef Sliders
The real beauty of this recipe is the lack of fuss. Most people overthink the beef, trying to treat it like a steakhouse burger, but the goal here is a cohesive, melty bite. By using a "slab" method with Hawaiian rolls, you create a protected environment where the steam from the beef keeps the buns soft on the inside while the oven crisps the edges.
I once tried to make these by assembling them one by one, and it was a disaster. The buns dried out, the cheese slid off the sides, and I spent more time cleaning the counter than eating. Switching to the baking dish method changed everything.
It turns the process into a simple layering project, which means you can actually hang out with your guests instead of being trapped in the kitchen.
This dish hits every taste bud. You have the savory punch of the beef, the sharp tang of the cheddar, and the buttery sweetness of the rolls. It is a balanced bite that doesn't need a dozen toppings to feel complete.
Plus, it is the kind of meal that kids actually get excited about, which is a win in any home cook's book.
Why the Layering Works
Since we are avoiding the "chef speak," let's just look at why this method actually delivers the results you want. It isn't magic, just a bit of common sense in the pan and oven.
- Slab Slicing: By keeping the rolls connected, you prevent the sides of the buns from roasting too quickly. This keeps the bread pillowy and soft.
- The Cheese Buffer: Placing a layer of cheese on the bottom bun before adding the beef creates a barrier. This stops the bread from soaking up too much grease, which prevents that dreaded soggy bottom.
- Double Cheese Blend: Cheddar provides the bold, sharp flavor, but mozzarella is the secret to that stretchy, velvety pull. Using both gives you the taste and the texture.
- Butter Seal: Brushing the tops with garlic butter does more than add flavor. It creates a fat based seal that browns the top of the buns into a mahogany crust without letting the moisture escape.
| Method | Prep Effort | Texture | Best For |
|---|---|---|---|
| Fast (Slab) | Low (10 min) | Soft & Gooey | Large groups, Families |
| Classic | High (30 min) | Charred & Firm | Individual burger lovers |
Ingredient Breakdown
Before we get into the gear, let's look at what these ingredients are actually doing for your Cheesy Beef Sliders. It's not just about following a list, but understanding why we chose these specific items.
| Ingredient | Role | Pro Secret |
|---|---|---|
| Lean Ground Beef | Savory Base | Drain the fat well to avoid soggy rolls |
| Sharp Cheddar | Flavor Punch | Grate it yourself for a smoother melt |
| Hawaiian Rolls | Sweet Contrast | Don't separate them until after baking |
| Garlic Butter | Aroma/Crust | Use melted butter for a more even soak |
The Shopping List
Stick to these measurements to keep the ratios right. If you use too much beef, the buns won't close; too little, and you'll have "cheese sandwiches."
- 1 lb lean ground beef Why this? Leaner meat means less grease soaking into the bread
- 1/2 tsp garlic powder
- 1/2 tsp salt
- 1/4 tsp black pepper
- 1 tbsp olive oil
- 8 oz sharp cheddar cheese, shredded Why this? Sharp flavor cuts through the richness of the butter
- 4 oz mozzarella cheese, shredded Why this? Provides the classic "cheese pull"
- 1 pack (12 count) Hawaiian sweet rolls
- 3 tbsp unsalted butter, melted
- 1 clove garlic, minced
- 1 tbsp fresh parsley, chopped
- 1/4 tsp paprika
If you don't have lean beef, you can use ground turkey, though it's a bit drier. For the cheese, a Colby Jack works if you want something milder. If you're out of Hawaiian rolls, any small sweet dinner roll will do, but the flavor will shift slightly.
Equipment Needed
You don't need any fancy gadgets for this. If you have a basic kitchen setup, you're already good to go.
- Large Skillet: For browning the beef. Cast iron is great, but non stick works fine.
- 9x13-inch Baking Dish: This fits the standard pack of 12 rolls perfectly.
- Pastry Brush: To get that garlic butter evenly across the top.
- Serrated Knife: Essential for slicing the entire slab of rolls without squishing them.
- Spatula: For breaking up the beef into small crumbles.
Bringing It Together
This is where we move from prep to execution. I like to think of this in three phases: the sear, the build, and the finish. If you've ever made a Classic Meatloaf, you know that the quality of the meat prep is everything.
Phase 1: Searing the Savory Beef
Heat the olive oil in your large skillet over medium high heat. Once the oil shimmers, add the ground beef. Sprinkle in the salt, pepper, and garlic powder immediately. Use your spatula to break the meat into small, uniform crumbles. According to guidelines on proper meat browning, leaving the meat alone for a minute before stirring helps develop a better crust. Cook until the beef is browned and fragrant, then drain any excess grease from the pan.
Phase 2: The Layered Assembly
Preheat your oven to 350°F (175°C). Take your pack of Hawaiian rolls and, without pulling them apart, slice the entire slab in half horizontally. This is the "slab slice" that saves your sanity.
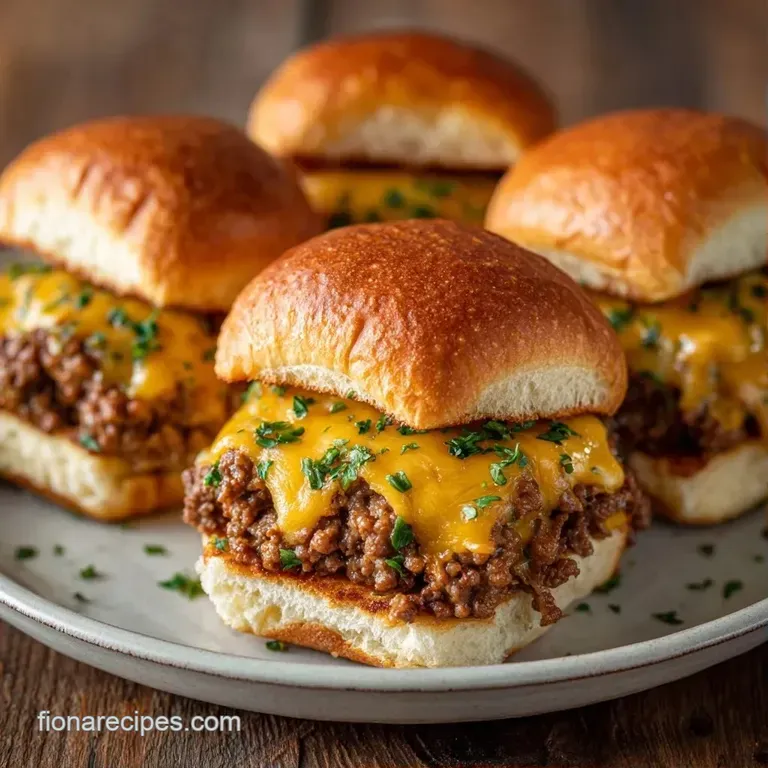
Place the bottom half of the rolls into the 9x13-inch baking dish. Now, we layer. Start with half of the shredded cheddar. Spread the cooked beef mixture evenly over the cheese. Top the beef with the mozzarella and the remaining cheddar.
Place the top bun slab firmly over the filling, pressing down slightly so everything locks together.
Phase 3: The Golden Finish
In a small bowl, whisk together the melted butter, minced garlic, parsley, and paprika. Use your pastry brush to coat the tops of the buns generously. Make sure you hit the edges so they don't dry out.
Bake for 15-20 minutes. You are looking for two things: the cheese should be bubbling and the buns should have turned a deep mahogany gold. Don't pull them out too early, or you'll miss that toasted crunch.
| Original Ingredient | Substitute | Why It Works |
|---|---|---|
| Lean Ground Beef | Ground Turkey | Leaner option. Note: Less flavor, needs more salt |
| Sharp Cheddar | Pepper Jack | Adds a spicy kick. Note: Changes flavor profile |
| Hawaiian Rolls | Brioche Sliders | Richer, buttery taste. Note: Less sweet than Hawaiian |
How to Fix Common Problems
Even with a simple recipe, things can go sideways. Most of the time, it comes down to moisture control.
Why Your Buns Are Soggy
This usually happens for two reasons: you didn't drain the beef grease, or you skipped the bottom layer of cheese. The beef releases fat as it bakes, and if there's no cheese barrier, the bread acts like a sponge.
Fixing Cold Centers
If the buns are brown but the cheese in the middle isn't melted, your oven might be running hot. Next time, tent the top with foil for the first 10 minutes to let the heat penetrate the beef before browning the top.
Managing Greasy Beef
Some beef is naturally fattier than others. If you see a pool of oil in your pan, don't just tilt it into the sink. Use a spoon to remove the fat or pat the meat with a paper towel before adding it to the rolls.
| Problem | Root Cause | Solution |
|---|---|---|
| Buns too hard | Overbaked | Reduce bake time by 2-3 mins |
| Cheese didn't melt | Cold ingredients | Let cheese reach room temp first |
| Buns falling apart | Slicing too hard | Use a serrated knife, saw gently |
Common Mistakes Checklist
- ✓ Drained the beef grease thoroughly
- ✓ Sliced the rolls horizontally as a slab
- ✓ Added the bottom layer of cheese
- ✓ Brushed butter to the very edges of the buns
Adjusting the Portion Size
You might not always be feeding a crowd of twelve. Here is how to handle different volumes without ruining the texture of your Cheesy Beef Sliders.
Cutting the Recipe in Half Use a smaller 8x8-inch baking dish. Use 1/2 lb of beef and 6 rolls. Reduce the baking time by about 20% (check them at 12-15 minutes) because the smaller mass heats through faster.
Doubling the Batch Do not try to put 24 sliders in one 9x13 pan; they will overflow and the middle won't cook. Use two separate pans. When doubling the spices, only increase the garlic powder and paprika to 1.5x. Over seasoning can make the meat taste metallic in larger batches.
Baking for a Crowd If you are making three or more pans, lower the oven temperature to 325°F (160°C) and extend the bake time by 5-10 minutes. This ensures the heat circulates evenly around all the pans without burning the tops.
Debunking Slider Myths
There are a few things people believe about sliders that just aren't true. Let's clear those up.
First, some say you must sear individual patties to get a "real" burger taste. In reality, browning the crumbled beef in a hot skillet creates plenty of flavor. Because the beef is enclosed in the buns during baking, it stays moist, making the patties unnecessary.
Second, there's a myth that sweet rolls are too sugary for dinner. Actually, the sweetness of the Hawaiian rolls acts as a foil to the saltiness of the beef and cheddar. It is the same reason people put jam on burgers or use brioche. The contrast is what makes the flavor pop.
Storage Guidelines
If you have leftovers (which is rare), you have a few options.
Fridge Storage Place the sliders in an airtight container. They will stay good for up to 3 days. The buns will soften as they sit, so you'll want to reheat them properly.
Freezer Options You can freeze these for up to 1 month. Wrap them tightly in foil and then put them in a freezer bag. When you're ready to eat, thaw them in the fridge overnight.
Reheating Tips Avoid the microwave if you can; it makes the buns rubbery. Instead, pop them in a 350°F (175°C) oven for 5-10 minutes.
If you have an air fryer, 3-5 minutes at 325°F is the fastest way to get that crust back.
Zero Waste Ideas If you have leftover beef mixture but no rolls, toss it into a breakfast scramble with eggs. If you have extra garlic butter, brush it on some Sourdough Discard Crackers for a quick savory snack.
Perfect Complements
Since these Cheesy Beef Sliders are quite rich, you want sides that bring some acidity or freshness to the plate. A crisp coleslaw with a vinegar based dressing or a simple side of sliced pickles works wonders.
If you're doing a full spread, I recommend a platter of raw veggies with a zesty ranch dip. The crunch of celery and carrots balances the softness of the sliders. For a drink, something sparkling like a cold ginger ale or a crisp seltzer helps cut through the richness of the melted cheese.
This combination makes the meal feel like a complete feast rather than just a heavy snack.
Recipe FAQs
Are cheesy beef sliders a good dinner idea for toddlers?
Yes, they are usually a hit. The sweet Hawaiian rolls and melted cheese appeal to picky eaters, and the bite sized portions are perfect for small hands.
How do I make easy cheesy beef sliders?
Brown ground beef with garlic powder, salt, and pepper. Layer the meat and cheese on sliced Hawaiian rolls, brush with garlic butter, and bake at 350°F for 15-20 minutes.
Can I make these cheesy beef sliders on Hawaiian rolls?
Yes, Hawaiian rolls are the ideal choice. Their sweetness balances the savory beef and they hold up well under the melted cheese.
How to prevent the sliders from getting soggy?
Drain any excess grease from the browned beef before layering it onto the rolls. This prevents the bottom bun from absorbing too much fat.
How long do these sliders last in the fridge?
Up to 3 days in an airtight container. Note that the buns will soften over time, so they require proper reheating to regain their texture.
How to reheat leftover sliders without them getting rubbery?
Bake in a 350°F (175°C) oven for 5-10 minutes. Avoid using the microwave, as it often makes the bread rubbery.
What is a good side dish to serve with these sliders?
A fresh green salad provides a great contrast. If you want something crisp, try a classic Cobb salad to balance the richness of the beef and cheese.
Cheesy Beef Sliders