S'mores Cookie Bars: Failure-Proof
- Time:15 minutes active + 30 minutes baking = Total 45 minutes
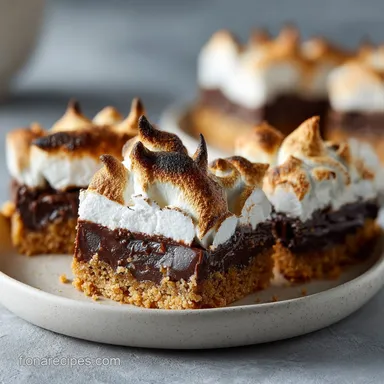
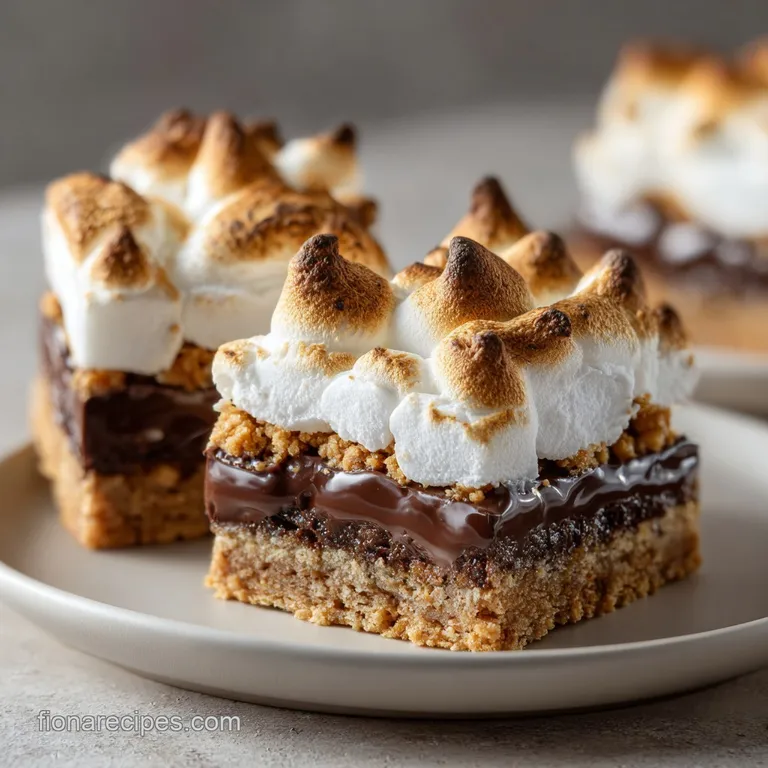
- Flavor/Texture Hook: Toasted, stretchy, and buttery with a slight sandy crunch
- Perfect for: Backyard parties, rainy day cravings, or a potluck dessert
- Foolproof Smores Cookie Bars
- Component Analysis
- Shopping List Breakdown
- Essential Gear Needed
- The Precise Baking Process
- Fixing Common Baking Issues
- Troubleshooting Common Issues
- Tasty Variations and Swaps
- Adjusting the Batch Size
- Kitchen Myths Debunked
- Storage and Reheating Tips
- What to Serve Alongside
- Recipe FAQs
- 📝 Recipe Card
The smell of toasted sugar and melted chocolate is enough to trigger a core memory of camping trips and midnight snacks. I remember one specific August night where the rain completely ruined our bonfire, leaving us with a pile of damp logs and a lot of disappointed kids.
I didn't want the night to end in a mood, so I dragged the s'mores supplies into the kitchen.
That night, I realized that making individual s'mores is a chore, and roasting over a stove is sketchy. I wanted something I could just slide into the oven and forget about for a bit. That's how these smores cookie bars became a staple in my house.
They give you that same nostalgic, campfire vibe without the smoke in your eyes or the struggle of keeping a marshmallow on a stick.
You can expect a base that's a hybrid between a traditional chocolate chip cookie and a graham cracker crust. It's dense, buttery, and holds up to the weight of the toppings. Trust me on this, the secret is all in the timing of when the marshmallows go in. If you do it too early, they disappear into the dough.
If you do it too late, they stay raw. We're aiming for that velvety, melted stretch that makes these bars feel like a professional bakery treat.
Foolproof Smores Cookie Bars
Right then, let's talk about why this version actually works. Most people just throw everything in a pan and hope for the best, but that usually leads to a soggy mess or burnt sugar. We're using a precise method to ensure the layers stay distinct.
Graham Integration: Using graham cracker crumbs directly in the dough changes the structure. It adds a honey like flavor and creates a slightly more porous crumb than using just flour.
Two Phase Heat: By baking the base first and the toppings second, we prevent the marshmallows from liquefying into the cookie. This keeps the base chewy and the top fluffy.
Sugar Balance: The use of brown sugar instead of granulated sugar adds moisture. This ensures that even after the second bake, the bars don't turn into hard bricks.
Fat Distribution: Softened butter, rather than melted, traps air during the creaming process. This gives the bars a bit of lift so they aren't just dense slabs of dough.
| Method | Time | Texture | Best For |
|---|---|---|---|
| Oven Bake | 45 mins | Consistent, toasted, chewy | Large crowds and parties |
| Stovetop | 15 mins | Patchy char, softer base | Quick 1-2 person cravings |
I've found that the oven is the only way to get that uniform golden brown finish on the marshmallows. If you're feeling impatient, a stovetop version works for a single serving, but you lose that structural integrity that makes a bar a bar.
Component Analysis
I've broken down the main ingredients here so you know exactly what they're doing in the pan. It's not just about taste, it's about how they behave under heat.
| Ingredient | Science Role | Pro Secret |
|---|---|---|
| Brown Sugar | Moisture & Color | Use dark brown sugar for a deeper, molasses like taste |
| Graham Crumbs | Flavor & Texture | Pulse them in a blender for a finer, more uniform "sand" |
| Baking Soda | Lift & Browning | Ensure it's fresh so the bars don't stay too flat |
| Mini Marshmallows | Aeration | Keep them in a cool spot before adding to prevent premature melting |
Shopping List Breakdown
Grab these items from the store. I recommend using a high-quality milk chocolate bar for the top, as the cheap stuff tends to separate and get oily when it melts.
- 1 cup (120g) all purpose flour Why this? Provides the main structure for the bar
- ¾ cup (75g) graham cracker crumbs Why this? Adds that essential s'mores flavor
- ½ tsp (3g) baking soda Why this? Helps the dough rise slightly
- ¼ tsp (1.5g) salt Why this? Cuts through the heavy sweetness
- ½ cup (115g) unsalted butter, softened Why this? Creates a velvety, rich mouthfeel
- ¾ cup (150g) packed brown sugar Why this? Adds chewiness and a caramel note
- 1 large egg (50g) Why this? Binds the dough together
- 1 tsp (5ml) vanilla extract Why this? Enhances the chocolate and sugar
- 1 cup (170g) semi sweet chocolate chips Why this? Provides pockets of melted cocoa
- 1 ½ cups (150g) mini marshmallows Why this? For that classic gooey topping
- 1 bar (4.4 oz / 125g) milk chocolate, broken into squares Why this? Creates a decadent top layer
- ¼ cup (30g) additional graham cracker crumbs Why this? For a professional finished look
| Original Ingredient | Substitute | Why It Works |
|---|---|---|
| All purpose Flour | Almond Flour | gluten-free alternative. Note: Denser crumb and slightly grainier texture |
| Brown Sugar | Coconut Sugar | Lower glycemic index. Note: Less moisture, so bars may be crispier |
| Milk Chocolate | Dark Chocolate (70%) | Bolder cocoa flavor. Note: Less sweet, balances the marshmallows better |
| Unsalted Butter | Vegan Butter | Plant based swap. Note: Similar fat content, check for salt levels |
If you're looking for other ways to use your baking skills for a party, these Valentine's Day Cookies are another great option. But for a crowd that wants something nostalgic, these bars are the way to go.
Essential Gear Needed
You don't need a professional kitchen for this, but a few specific tools make it foolproof.
- 9x13 inch baking pan: The standard size for these bars.
- Parchment paper: Non negotiable. Without this, the marshmallows will glue themselves to the pan.
- Electric hand mixer: Great for creaming the butter and sugar, though a whisk and elbow grease work too.
- Silicone spatula: For folding in the chips and pressing the dough.
The Precise Baking Process
Follow these steps closely. The timing is the most important part here to ensure you don't end up with a burnt bottom and raw marshmallows.
- Line a 9x13 inch baking pan with parchment paper, leaving an overhang on the sides. Note: This makes lifting the whole block out much easier
- In a medium bowl, whisk together the all purpose flour, 75g graham cracker crumbs, baking soda, and salt until no lumps remain.
- Cream the softened butter and brown sugar together using a mixer until the mixture is pale and fluffy.
- Beat in the egg and vanilla extract.
- Gradually fold in the dry ingredients using a spatula until just combined, then stir in the semi sweet chocolate chips.
- Press the dough evenly into the prepared pan and bake at 350°F (175°C) for 18-22 minutes until edges are deep golden brown.
- Remove from oven and immediately press the milk chocolate squares and mini marshmallows into the top of the hot cookie layer.
- Return to the oven for 5-7 minutes, or until marshmallows are puffed and toasted.
- Garnish with additional graham cracker crumbs before serving.
Chef's Note: Don't over mix the dough in step 5. If you beat the flour too much, you'll develop too much gluten, and your smores cookie bars will be tough instead of chewy.
Fixing Common Baking Issues

Baking is a science, and sometimes the variables go sideways. Most issues with these bars come down to temperature or timing.
Troubleshooting Common Issues
| Issue | Solution |
|---|---|
| Why Your Bars Are Too Flat | This usually happens if your butter was too melted or your baking soda is old. If the butter is liquid, it can't hold the air bubbles created during creaming. Ensure your butter is "cool room temperat |
| Why Your Marshmallows Dissolved | If you leave the bars in for too long during the second bake, the marshmallows will collapse into a sugary puddle. This is the "Sinking Marshmallow Syndrome." Pull them out as soon as they are puffed |
| Why the Base is Gummy | Under baking the base layer is the culprit. If the edges aren't deep golden brown before you add the toppings, the middle will stay raw. Trust the visual cue of the edges rather than just the timer. < |
Precision Checklist:
- ✓ Butter is softened, not melted.
- ✓ Pan is lined with parchment paper.
- ✓ Base edges are deep golden brown.
- ✓ Marshmallows are removed immediately after puffing.
- ✓ Bars have cooled for at least 20 mins before slicing.
Tasty Variations and Swaps
If you want to move away from the classic profile, there are a few ways to tweak this. If you're in the mood for something lighter and more tart, you might try White Chocolate Cranberry Cookies, but if you're sticking with the bars, try these.
- Peanut Butter Twist: Swirl 1/4 cup of melted peanut butter into the dough before baking.
- Darker Profile: Replace the milk chocolate squares with 70% dark chocolate to cut the sugar.
- S'mores Fluff: Swap the mini marshmallows for a layer of marshmallow fluff for a more velvety texture.
Decision Shortcut:
- If you want a fudgier center, underbake the base by 2 minutes.
- If you want a crispier edge, use a metal pan instead of glass.
- If you want a more "sandy" texture, double the graham cracker crumbs and reduce flour by 2 tablespoons.
Adjusting the Batch Size
You can definitely scale these smores cookie bars, but you have to adjust the physics of the pan.
Scaling Down (1/2 Batch): Use an 8x8 inch pan. Reduce the base baking time by about 20% (check at 14-15 minutes). Since you can't use half an egg easily, beat one egg in a bowl and use 25g of it.
Scaling Up (2x Batch): Work in batches or use two 9x13 pans. Don't just double the thickness in one pan, or the middle will never cook through. For the sugar and salt, only increase to 1.5x to avoid an overwhelming sweetness.
If baking two pans at once, lower the temp to 325°F and extend the time by 5-10 minutes to ensure even heat flow.
Kitchen Myths Debunked
Let's clear up a few things I see people arguing about in the comments of food blogs.
Myth: "Searing" the marshmallows on a broiler is better. Truth: While a broiler is fast, it's too aggressive for bars. It burns the top before the chocolate underneath has a chance to melt. The 5-7 minute oven return is the only way to get that gooey interior.
Myth: More marshmallows make it "more s'mores." Truth: Too many marshmallows create a moisture barrier. The steam gets trapped, and your cookie base ends up soggy. Stick to the 1.5 cup limit for the best structural balance.
Storage and Reheating Tips
To keep these bars from getting stale, you need to protect them from the air.
Storage: Keep them in an airtight container at room temperature for up to 3 days. If you live in a humid area, put them in the fridge for up to 7 days, but you'll need to reheat them.
Freezing: These freeze surprisingly well. Wrap individual squares in parchment and place them in a freezer bag for up to 3 months.
Reheating: To get that "just baked" stretch, pop a square in the microwave for 10-15 seconds. Don't go longer, or the marshmallow will expand and then collapse into a flat disk.
Zero Waste: If you have leftover graham cracker crumbs, don't toss them! Mix them with melted butter and sugar to make a quick crust for a cheesecake or a tart.
What to Serve Alongside
Since these are incredibly rich, you need something to balance the sugar.
A cold glass of whole milk is the classic choice, but a strong, unsweetened black coffee or a cold brew is even better. The bitterness of the coffee cuts right through the velvetiness of the chocolate and marshmallow.
If you're serving these at a party, a platter of sliced green apples or fresh strawberries provides a tart contrast that keeps guests coming back for more.
Recipe FAQs
What are common S'mores bar mistakes?
Overbaking marshmallows or using melted butter. Marshmallows collapse into a sugary puddle if left in too long, while butter that is too liquid prevents the bars from holding air, resulting in a flat texture.
What to include in a S'mores bar?
A blend of graham cracker crumbs, chocolate, and marshmallows. This recipe uses a base of flour, butter, brown sugar, and semi sweet chocolate chips, topped with milk chocolate squares and mini marshmallows.
What chocolate bars do you use for S'mores?
Milk chocolate for the topping and semi sweet chips for the base. This combination ensures the bars have a rich, balanced sweetness without being overwhelming.
How to store and freeze these bars?
Keep them in an airtight container at room temperature for 3 days. For longer preservation, wrap individual squares in parchment and place them in a freezer bag for up to 3 months.
How to reheat a bar for the best texture?
Microwave a square for 10-15 seconds. This restores the melted marshmallow stretch; heating longer will cause the marshmallow to expand and then collapse.
Is it true that the base must be completely cooled before adding toppings?
No, this is a common misconception. Press the milk chocolate squares and mini marshmallows into the top immediately after removing the hot cookie layer from the oven.
Can I make these as individual cookies instead of bars?
Yes, you can scoop the dough into rounds. If you enjoyed the texture here, the same creaming method is used to achieve the results in our soft chocolate chip cookies.
S Mores Cookie Bars