Whipped Honey Butter: Silky and Airy
- Time: Active 10 minutes, Passive 0 minutes, Total 10 minutes
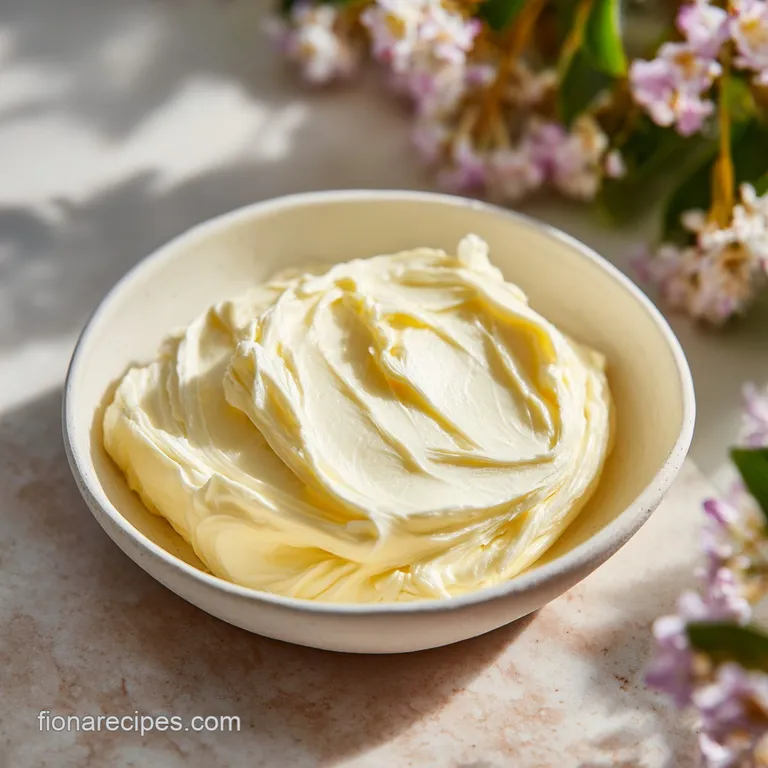
- Flavor/Texture Hook: Silky, airy, and delicately sweet
- Perfect for: Sunday brunch, holiday rolls, or kid approved weeknight snacks
- Whipping Up The Best Honey Butter Recipe
- Why This Fluffy Spread Works
- Essential Components for Balanced Texture
- Selecting The Best Quality Pantry Staples
- Essential Tools for Fluffy Results
- Master The High Speed Whipping Technique
- Solving Common Texture and Temperature Issues
- Serving Size and Batch Guidelines
- Whipped Butter Myths
- Keeping Your Whipped Butter Fresh Longer
- Simple Styling Tips for Family Dinners
- Recipe FAQs
- 📝 Recipe Card
Whipping Up The Best Honey Butter Recipe
In the American South, a basket of warm rolls is never truly complete without a generous scoop of honey butter sitting right in the center of the table. It is a cultural staple that turns a simple piece of bread into an event.
I remember sitting at my grandmother's heavy oak table, watching her whip butter by hand with a wooden spoon until her arm ached, just to get that specific, pale ivory color that signaled it was ready for the honey. It wasn't just a topping, it was a gesture of hospitality that made every meal feel a bit more special.
We often think of this as something you only get at those big steakhouse chains, served alongside those bottomless baskets of rolls. But honestly, the store-bought tubs don't even come close to the real thing you can make in your own kitchen in about 10 minutes.
This honey butter recipe focuses on getting as much air into the fat as possible, which changes the way it feels on your tongue. Instead of a heavy, greasy smear, you get a velvety foam that carries the floral notes of the honey much better than cold butter ever could.
This version is my go to because it is budget friendly and uses ingredients most of us already have in the cupboard. There is something deeply satisfying about watching deep yellow butter transform into a light, whipped peak.
It is a kid approved favorite at our house, especially on Saturday mornings when the smell of toasted bread fills the kitchen. We are going to skip the complex additives and stick to real food that actually tastes like home.
Why This Fluffy Spread Works
- Air Incorporation: Beating the butter for a full 3 minutes creates tiny air pockets that lighten the density significantly.
- Fat Sugar Bond: The honey acts as a stabilizer, wrapping around those air bubbles to keep the spread fluffy even after it sits.
- Salt Contrast: Sea salt cuts through the richness of the grass fed fat, making the honey flavor pop instead of feeling cloying.
- Temperature Synergy: Starting with room temperature fat allows the honey to emulsify rather than just sliding around on a cold surface.
| Whipping Method | Time | Texture | Best For |
|---|---|---|---|
| Stand Mixer | 5 minutes | Cloud like, stiff peaks | Large batches/Holidays |
| Hand Mixer | 7 minutes | Fluffy, very soft | Everyday family meals |
| Hand Whisk | 12 minutes | Dense, creamy | Small batches/Exercise |
Choosing the right method depends on how much "lift" you want in your spread. While a stand mixer gives you the most volume with the least effort, a hand mixer works perfectly for a standard batch.
If you are feeling brave and want to do it by hand, just be prepared for a bit of a workout to get those air bubbles incorporated!
Essential Components for Balanced Texture
| Ingredient | Science Role | Pro Secret |
|---|---|---|
| Unsalted Butter | Structural base | Use grass fed for a deeper, natural yellow color and better fat profile. |
| Raw Local Honey | Natural emulsifier | Local honey contains unique floral notes that vary by season and region. |
| Fine Sea Salt | Flavor enhancer | Small grains dissolve faster than kosher salt, preventing a gritty texture. |
Selecting The Best Quality Pantry Staples
- 1 cup (226g) Unsalted Grass Fed Butter: Softened to room temperature. Why this? high-quality butter has less water, leading to a much creamier, stable whip.
- Substitute: Standard unsalted butter works fine, but avoid margarine as it won't hold the air.
- 1/4 cup (85g) Raw Local Honey: Liquid state is best. Why this? It provides a richer, more complex sweetness than processed clover honey.
- Substitute: Maple syrup can work, but it will result in a thinner, softer consistency.
- 1/2 tsp Fine Sea Salt: To balance the sweetness. Why this? It sharpens the flavor and acts as a very mild preservative.
- Substitute: Table salt is okay, but use slightly less as it tastes "saltier" by volume.
- 1 tsp Ground Saigon Cinnamon (optional): For a warm, spiced aroma.
- Substitute: Pumpkin pie spice adds a nice autumn twist to the flavor profile.
- 1/2 tsp Pure Vanilla Bean Paste (optional): Adds those beautiful tiny black specks.
- Substitute: Standard vanilla extract works, though the flavor is slightly less intense.
Essential Tools for Fluffy Results
To get the results we are after, a stand mixer fitted with the whisk attachment is your best friend. It provides the consistent high speed needed to force air into the fat without melting it from the heat of your hands.
If you don't have one, a handheld electric mixer works, though it might take a minute or two longer to reach that ivory color.
You will also want a flexible silicone spatula. Honey is notoriously clingy, and you will need to scrape the bottom of the bowl several times. Without this, you might end up with a layer of unmixed honey at the bottom, which leads to a streaky spread. Finally, grab a glass jar or a small ceramic crock for storage.
Glass doesn't hold onto old food smells, so your butter will stay tasting fresh and clean.
Master The High Speed Whipping Technique

- Place 1 cup of softened butter in your mixing bowl.
- Attach the whisk and beat on medium high speed for 3 minutes. Note: Watch for the color to change from yellow to a pale ivory white.
- Reduce the mixer speed to low to avoid splashing.
- Slowly drizzle in 1/4 cup of honey in a thin, steady stream.
- Stop the mixer and use a spatula to scrape the sides and bottom thoroughly. Note: This ensures every bit of honey is trapped in the fat.
- Turn the speed back up to high and whip for another 2 minutes. The mixture should look like stiff peaked whipped cream.
- Toss in 1/2 tsp of sea salt (and optional cinnamon or vanilla) during the final 30 seconds of mixing.
- Transfer the whipped spread into a clean jar immediately.
Solving Common Texture and Temperature Issues
Fixing A Greasy Texture
If your butter looks oily or flat instead of fluffy, the fat was likely too warm when you started. If the butter is "greasy" to the touch before you even start, it has lost its structural integrity.
You can sometimes save this by putting the bowl in the fridge for 5 minutes and then trying to whip it again.
Why Butter Stays Yellow
If you have been beating for 3 minutes and it is still bright yellow, you need to increase the speed. The color change is a visual cue that enough air has been forced into the mixture. If the mixer is too slow, you are just stirring the butter, not aerating it.
| Problem | Root Cause | Solution |
|---|---|---|
| Separating | Honey added too fast | Add honey in a very slow stream while whisking constantly. |
| Gritty Feel | Large salt crystals | Switch to fine sea salt or dissolve salt in the honey first. |
| Flat/Heavy | Butter was too cold | Let butter sit at room temp until your finger leaves an easy indent. |
Since honey and butter have different densities, they don't naturally want to stay together. This is why the aeration step is so vital. If you find your spread separating after a day in the fridge, it usually means the emulsion wasn't strong enough. In my experience, using a stand mixer such as KitchenAid makes this much more stable than doing it by hand.
Common Mistakes to Avoid:
- ✓ Don't use melted butter; it will never whip, no matter how long you beat it.
- ✓ Use a room temperature bowl; a cold bowl will make the butter seize and go lumpy.
- ✓ Scrape the bowl twice; honey likes to hide at the very bottom under the whisk.
- ✓ Avoid "whipped" tub butter as a base; it already has too much air and added water.
Serving Size and Batch Guidelines
If you are cooking for a crowd or meal prepping for the week, you might need to adjust the quantities.
- Downsizing (1/2 batch): Use 1/2 cup of butter and 2 tablespoons of honey. You might need to use a smaller bowl or a hand mixer, as a large stand mixer bowl won't have enough volume for the whisk to reach effectively.
- Upscaling (2x-4x): When doubling, you don't necessarily need to double the salt. Start with 1.5x the salt and taste as you go. The honey can be doubled exactly. If you are making a massive batch for a party, work in two cup increments to keep the aeration consistent.
For those of us watching the budget, using a standard grocery store butter and a larger bottle of honey works perfectly well. You can save the expensive grass fed stuff for a special Classic Meatloaf dinner where the butter is the star of the side rolls.
Whipped Butter Myths
A common misconception is that you need powdered sugar to make it fluffy. People think the sugar provides the structure, but it actually just adds unnecessary grittiness and calories. The air you beat into the fat is what provides the lift, not the sugar.
Another myth is that honey butter must be kept in the fridge at all times. While the fridge is best for long term storage, this spread is perfectly safe at room temperature for a day or two, provided your kitchen isn't too hot. In fact, it tastes much better when it is soft enough to spread effortlessly.
Keeping Your Whipped Butter Fresh Longer
Storage: Keep your honey butter in an airtight container in the refrigerator for up to 2 weeks. Because we've introduced air and honey, it won't last as long as a plain stick of butter. Always use a clean knife when scooping to prevent cross contamination.
Freezing: This actually freezes beautifully! You can freeze it in small portions or a single block for up to 2 months. To thaw, just place it in the fridge overnight. You might need to give it a quick whip with a fork once it reaches room temperature to bring back that airy texture.
Zero Waste: If you have a small amount of honey butter left in the jar that isn't enough for a roll, don't toss it. It is incredible when melted over a bowl of oatmeal or used to sauté carrots for a sweet glaze.
You can even stir a spoonful into your coffee for a "bulletproof" style treat with a honey twist.
Simple Styling Tips for Family Dinners
For a family dinner, I like to scoop the butter into a small wooden bowl and sprinkle a tiny pinch of extra sea salt on top. It makes it look rustic and intentional. If you want to get fancy for a holiday, you can use a piping bag with a star tip to make individual butter rosettes on a parchment lined tray.
Chill them until firm, and then set them out right before the bread hits the table.
If you are serving this with cornbread, try drizzling a tiny bit of extra honey over the top of the butter in the bowl. It creates these beautiful golden swirls that look stunning. Honestly, even just a simple crock with a small butter knife works wonders. It is all about making the meal feel cozy and effortless.
Trust me, once your family tries this, they will never want the cold, hard sticks of butter again!

Recipe FAQs
How is honey butter made?
Beat softened butter on medium high for 3 minutes until pale ivory. Slowly stream in honey while mixing, scrape the bowl, then whip on high for 2 minutes and fold in salt, cinnamon, or vanilla.
What is in Texas Roadhouse honey butter?
It relies on unsalted butter, raw honey, sea salt, cinnamon, and vanilla bean paste. This combination creates the signature sweet, aromatic profile associated with restaurant style spreads.
What's the best ratio for honey butter?
Use 4 parts butter to 1 part honey. This specific ratio ensures the honey flavors the fat without causing the emulsion to break or become too runny.
What makes honey butter so good?
The secret is aeration. By whipping the butter until it reaches a stiff peaked, glossy consistency, you transform a dense fat into a light, cloud like foam that melts instantly on warm bread. If you enjoyed mastering this aeration technique, see how we achieve a similarly light texture in other whipped desserts.
Does the temperature of the butter matter?
Yes, it must be room temperature. Cold butter will not aerate properly, while melted butter will fail to hold the honey in a stable emulsion.
Is it true I must whip it for the full 5 minutes?
Yes, the time is essential for the texture. The initial 3-minute beat aerates the base, and the final 2-minute whip ensures the honey is fully incorporated into a stable, silky foam.
How long will this stay fresh?
Store it in an airtight container for up to one week in the refrigerator. Let it sit at room temperature for a few minutes before serving to ensure the best spreadable consistency.
Whipped Honey Butter

Ingredients:
Instructions:
Nutrition Facts:
| Calories | 117 kcal |
|---|---|
| Protein | 0.1 g |
| Fat | 11.5 g |
| Carbs | 4.4 g |
| Fiber | 0 g |
| Sugar | 4.4 g |
| Sodium | 73 mg |
