Homemade Biscuits: Tall and Fluffy

- Time: Active 20 minutes, Passive 15 minutes, Total 35 minutes
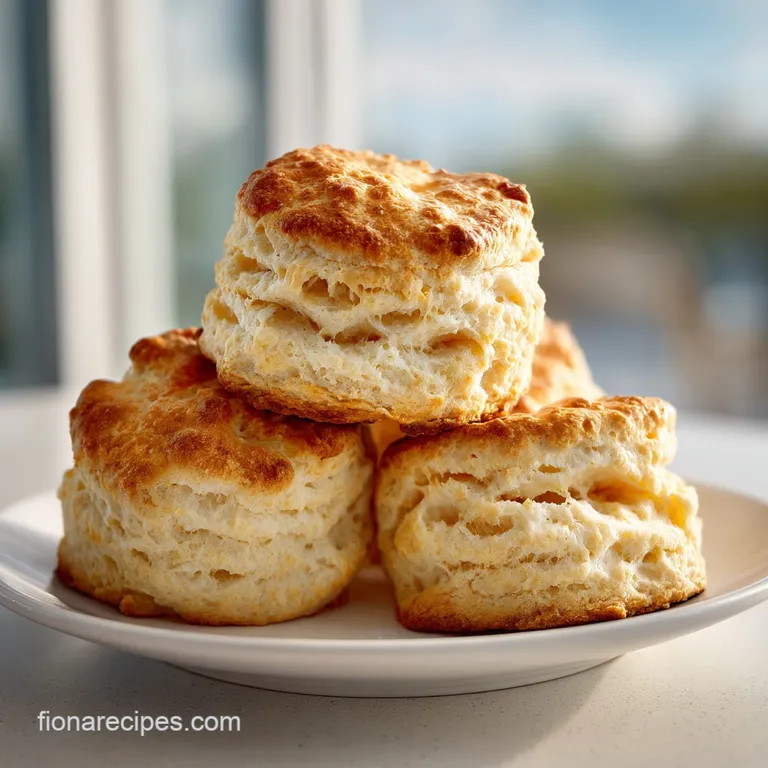
- Flavor/Texture Hook: Shatter crisp golden tops with a soft, velvety interior
- Perfect for: Stress free family breakfasts or kid approved weeknight sides
- Mastering Golden Flaky Layers in Your Homemade Biscuits
- How Cold Fat Creates That Signature Shatter Crumb
- Ingredient Deep Dive for Maximum Success
- Simple Pantry Staples for a Stress Free Batch
- Essential Kitchen Tools for a Taller Biscuit Rise
- Step by Step Guide to Perfect Southern Style Layers
- Troubleshooting Tips for Heavy or Flat Baked Goods
- Creative Flavor Twists and Budget Friendly Ingredient Swaps
- Clearing Up Common Baking Misconceptions
- Storing and Reheating Tips to Keep Them Fresh
- Serving Suggestions for a Hearty Family Style Breakfast
- Recipe FAQs
- 📝 Recipe Card
Mastering Golden Flaky Layers in Your Homemade Biscuits
Forget everything you have been told about needing "biscuit hands" or a secret family heirloom pastry cutter to get a decent rise. For years, I believed the myth that if I didn't spend thirty minutes meticulously cutting fat into flour until my wrists ached, I was doomed to serve hockey pucks.
I once tried a recipe that insisted on "pea sized" bits of butter, but by the time I was done, the heat from my hands had turned the dough into a greasy, slumped mess. It was a disaster that ended with us eating plain toast for Sunday brunch, and I almost gave up on the whole idea of baking from scratch.
The real secret to success in a busy kitchen isn't fancy equipment, it is actually a cold box grater. When I first tried grating frozen butter directly into the dry ingredients, the heavens opened.
The butter stays cold, the flour coats every strand perfectly, and the result is a biscuit that practically explodes with height in the oven. You don't need a culinary degree or a sourdough starter to make this happen, you just need a freezer and a little bit of patience.
This recipe is designed for real life, where the kids are hungry and you want something hearty without the fuss of a gourmet project.
Trust me on this, once you see those layers peel apart after only fifteen minutes in the oven, you will never look at a blue can of dough the same way again. We are making real food with simple pantry staples that fit into a tight budget but deliver five star results.
It is about that specific aroma of toasted flour and salty butter that fills the house, signaling to everyone that a warm meal is finally on the table. Let's get into the mechanics of why this works so well.
How Cold Fat Creates That Signature Shatter Crumb
The physics of a great rise comes down to one thing: steam. When those tiny, frozen shards of butter hit the 425°F heat of your oven, the water inside the butter evaporates instantly. This creates little pockets of air that push the dough upward before the flour has a chance to set.
If the butter is even slightly warm, it just soaks into the flour like a sponge, leaving you with a dense, heavy crumb instead of those flaky, separated sheets we all crave.
Why the Butter Stays Frozen
The frozen state is non negotiable because it prevents the fat from emulsifying with the flour during the mixing stage. If you enjoy the science of how fats and liquids interact to create smooth textures, you might find my creamy cheese sauce technique interesting, though for biscuits, we actually want the opposite of a smooth blend. We want distinct, isolated islands of fat that melt only once they are inside the oven.
The Power of Buttermilk
Buttermilk isn't just for flavor, it is the fuel for our leavening agents. The acidity in the buttermilk reacts with the baking soda to create an immediate fizz of carbon dioxide. This chemical reaction provides the initial lift, while the baking powder takes over during the bake to ensure the biscuits keep climbing.
It also breaks down the gluten slightly, which is why the inside stays so soft and velvety rather than becoming chewy like bread.
| Thickness | Internal Temp | Rest Time | Visual Cue |
|---|---|---|---|
| 1 inch | 200°F-205°F | 5 minutes | Golden brown top, pale sides |
| 0.5 inch | 205°F | 3 minutes | Fast browning, crispier bottom |
| 1.5 inches | 195°F | 8 minutes | Tall height, needs extra time |
Adding a little sugar to the mix might seem odd for a savory bread, but it serves a functional purpose. It aids in the browning process through caramelization, giving the tops that beautiful toasted color while keeping the interior moist.
Without that tiny pinch of sugar, the biscuits can look pale and unappealing even when they are fully cooked through.
Ingredient Deep Dive for Maximum Success
Understanding the role of each component helps you make smart swaps without ruining the final product. We use all purpose flour because it has the right balance of protein for structure without being as tough as bread flour.
If you go too low on protein, like with cake flour, the biscuits might collapse under their own weight.
| Ingredient | Science Role | Pro Secret |
|---|---|---|
| All Purpose Flour | Structural Base | Weigh it to avoid packing the cup too tightly |
| Frozen Butter | Steam Creation | Grate it onto a cold plate first to keep it chilled |
| Buttermilk | Acid Reactant | Keep it in the fridge until the very last second |
| Baking Powder | Secondary Lift | Check the expiration date; it loses power after 6 months |
Using fine sea salt is better than coarse kosher salt here because it dissolves quickly into the dough. You don't want to bite into a large salt crystal in the middle of a soft biscuit. The 6g of salt called for provides that savory backbone that makes the butter flavor really pop.
Simple Pantry Staples for a Stress Free Batch
- 425g all purpose flour: This is the backbone. Why this? Provides enough protein for a tall rise without being too tough.
- 15g baking powder: The heavy lifter. Why this? Ensures the biscuits stay tall and airy after the initial steam puff.
- 2g baking soda: The browning agent. Why this? Reacts with buttermilk for lift and a beautiful golden crust.
- 6g fine sea salt: The flavor enhancer. Why this? Sharpens the buttery notes and balances the slight sweetness.
- 4g granulated sugar: The color booster. Why this? Helps with caramelization on the top of the biscuit.
- 113g unsalted butter, frozen: The layer maker. Why this? Creates steam pockets that result in a flaky texture.
- 240ml cold buttermilk: The tenderizer. Why this? Its acidity keeps the crumb soft and velvety.
- 28g unsalted butter, melted: The finishing touch. Why this? Adds a rich, glossy sheen and extra saltiness to the crust.
| Original Ingredient | Substitute | Why It Works |
|---|---|---|
| Buttermilk (240ml) | Milk + 1 tbsp Vinegar | Mimics the acidity needed to react with baking soda |
| Unsalted Butter (113g) | Frozen Margarine | Similar fat content. Note: Result will be less flavorful and softer |
| All Purpose Flour (425g) | White Whole Wheat | Higher fiber. Note: Biscuits will be denser and much darker |
Adding the melted butter at the very end is a small step that most people skip, but it is what gives these that "restaurant" look. It soaks into the top layer while the biscuit is still steaming hot, creating a buttery seal that keeps the interior from drying out as it cools.
Essential Kitchen Tools for a Taller Biscuit Rise
You do not need a specialized pastry blender or a heavy duty stand mixer for this. In fact, using your hands and a simple box grater is actually better because it gives you more control over the temperature.
I prefer a large stainless steel mixing bowl because it stays colder than plastic, which helps keep the butter from softening while you are mixing.
A 2.5 inch round cutter is standard, but you can also use a sharp knife to cut the dough into squares. This "no waste" method is actually a favorite in my house because you don't have to re roll the scraps.
Every time you re roll the dough, you toughen the gluten and lose some of those micro layers we worked so hard to build. If you do use a round cutter, the most important rule is to never twist it. Press straight down and pull straight up.
Twisting seals the edges of the dough together, which acts like a glue that prevents the biscuit from rising.
step-by-step Guide to Perfect Southern Style Layers
- Whisk the 425g flour, 15g baking powder, 2g baking soda, 6g salt, and 4g sugar in a large bowl. Note: This ensures the leavening is perfectly distributed so you don't get bitter clumps.
- Grate the 113g frozen butter using the large holes of a box grater directly into the flour. until you have a pile of butter ribbons.
- Toss the butter with a fork gently to coat every piece in flour. Note: This prevents the butter from clumping back together into a solid mass.
- Pour the 240ml cold buttermilk into a well in the center of the dry ingredients.
- Fold the flour into the liquid with a spatula until a shaggy, messy dough forms.
- Turn the dough onto a floured surface and pat it into a rough rectangle with your hands.
- Perform the 'Letter Fold' by folding the dough in thirds like a piece of mail. Note: This creates the physical layers of fat and flour that will later separate.
- Repeat the folding process 3-5 times until the dough feels slightly more cohesive.
- Pat the dough to 1 inch thickness and cut 9 biscuits using a 2.5 inch cutter.
- Bake at 425°F (218°C) for 15 minutes until the tops are golden and the kitchen smells like a bakery.
Troubleshooting Tips for Heavy or Flat Baked Goods
Biscuits are dense and heavy
This usually happens because the butter melted before the biscuits hit the oven. If your kitchen is warm, or if you handled the dough too much with your bare hands, the fat loses its structure. Next time, try chilling the bowl and the flour in the fridge for 10 minutes before you start.
You should be able to see actual chunks of butter in the dough right before it goes into the oven.
Biscuits tilted or rose unevenly
If your biscuits look like the Leaning Tower of Pisa, you probably twisted the cutter. When you twist, you "smear" the layers at the edge, effectively welding them shut. Another cause is spacing. If they are too far apart on the baking sheet, they tend to spread out rather than up.
Keep them touching or very close together so they can support each other as they climb.
| Problem | Root Cause | Solution |
|---|---|---|
| Tough texture | Overworking the dough | Stop mixing as soon as the flour is moistened |
| No rise | Expired baking powder | Test powder in hot water; it should bubble instantly |
| Bottoms burnt | Dark baking sheet | Use parchment paper or move the rack up one level |
Common Mistakes Checklist
- ✓ Ensure the butter is rock hard frozen (prevents early melting)
- ✓ Use cold buttermilk straight from the fridge (keeps dough temperature low)
- ✓ Pat the dough rather than rolling it (preserves air pockets)
- ✓ Space biscuits closely on the pan (encourages vertical growth)
- ✓ Brush with melted butter immediately after baking (adds moisture and shine)
Creative Flavor Twists and Budget Friendly Ingredient Swaps
If you want to stretch your budget, you can make these without buying actual buttermilk. Just add a tablespoon of white vinegar or lemon juice to regular milk and let it sit for five minutes. It won't be quite as thick, but the chemical reaction with the baking soda will still give you a great rise.
For a savory twist, toss in a half cup of shredded sharp cheddar and a teaspoon of garlic powder to the dry ingredients.
For another hearty family dinner, these biscuits are the perfect side for my beef cornbread bake, especially if you use the "no waste" square cut method. You can also turn these into dessert by adding an extra tablespoon of sugar to the dough and brushing the tops with honey instead of butter. If you find yourself with extra dough scraps that are too small for a full biscuit, just bake them as "biscuit bites" for the kids they always disappear first.
If you want X, do Y
- If you want extra crispy bottoms: Bake them in a preheated cast iron skillet with a teaspoon of melted butter at the bottom.
- If you want a softer, pull apart style: Arrange them in a cake pan so they are snug and touching on all sides.
- If you want a rustic look: Skip the cutter entirely and just spoon clumps of dough onto the sheet as "drop biscuits."
Clearing Up Common Baking Misconceptions
One major myth is that you must use "Southern" flour like White Lily to get a good biscuit. While that flour is lovely and low protein, you can get incredible results with standard all purpose flour by simply not over mixing.
The protein content only becomes a problem when you develop the gluten through excessive kneading. If you keep your hands off the dough as much as possible, AP flour works perfectly.
Another misconception is that the dough should look smooth and pretty before cutting. In reality, a good biscuit dough should look a bit shaggy and "messy." If it looks like smooth pizza dough, you have worked it too much. Those craggy bits and uneven edges are exactly what turn into crispy, golden ridges in the oven.
Embrace the mess, it is a sign of a tender biscuit.
Storing and Reheating Tips to Keep Them Fresh
These are best eaten within twenty minutes of leaving the oven, but they do store reasonably well. Keep them in an airtight container at room temperature for up to 2 days. To reheat, don't use the microwave unless you want a rubbery mess.
Instead, wrap them in foil and pop them into a 350°F oven for about 5 minutes. This restores the exterior crunch while warming the center.
For long term storage, you can freeze the unbaked biscuit rounds. Place them on a tray in the freezer for an hour until solid, then toss them into a freezer bag for up to 3 months.
When you are ready for a fresh biscuit, just bake them straight from frozen at 400°F for about 20 minutes. This is a lifesaver for busy weeknights when you need a quick side dish but don't have time for the prep.
Don't throw away any leftover crumbs toast them in a pan with a little butter and use them as a crunchy topping for salads or mac and cheese.
Serving Suggestions for a Hearty Family Style Breakfast
A warm biscuit is a blank canvas. For a classic comfort meal, split them open and ladle on some thick sausage gravy. If you are going for something lighter, a simple smear of local honey or strawberry jam is hard to beat.
My kids love them as mini breakfast sandwiches with a folded egg and a slice of sharp cheddar cheese tucked inside.
If you are serving these for a large family gathering, put the whole tray in the middle of the table with a bowl of whipped salted butter. There is something so satisfying about the sound of that first biscuit being pulled apart it makes a soft "pouf" of steam and reveals all those internal layers.
Since they only take 15 minutes to bake, I usually wait until everyone is sitting down to put them in the oven, ensuring they are at peak flakiness when they hit the plate. Just remember to keep an eye on them, as that high heat can turn golden brown to burnt quite quickly if you aren't careful.

Recipe FAQs
What is the simplest biscuit recipe?
Use the standard ratio of flour, baking powder, baking soda, salt, sugar, frozen grated butter, and cold buttermilk. The simplest approach is to minimize handling fold the dough only 3-5 times to create layers and bake at 425°F for 15 minutes.
What is the secret to a good biscuit?
Keep everything cold and don't twist the cutter. Using frozen grated butter creates steam pockets during baking, while pressing the cutter straight down prevents sealing the edges, which allows the biscuit to rise fully.
What ingredients do you need to make a biscuit?
You need 425g flour, 15g baking powder, 2g baking soda, 6g salt, 4g sugar, 113g frozen butter, and 240ml cold buttermilk. Finish the tops with 28g of melted butter immediately after pulling them from the oven.
Is it cheaper to make your own biscuits?
Yes, homemade biscuits are significantly more cost effective than store-bought options. By using pantry staples like flour and buttermilk, you reduce the price per serving while achieving a much higher quality product.
Why did my biscuits come out flat and dense?
The dough likely got too warm or was handled too much. If the butter melts before the biscuits hit the hot 425°F oven, you lose the lift. If you enjoyed the silky custard texture in other bakes, you know how crucial temperature control is for achieving the right internal structure.
How to store and reheat biscuits?
Store in an airtight container at room temperature for up to 2 days. To reheat, wrap them in foil and place them in a 350°F oven for 5 minutes rather than using a microwave, which turns them rubbery.
How to freeze biscuit dough for later?
Place unbaked biscuit rounds on a tray in the freezer for one hour. Once they are solid, move them into a freezer bag to prevent freezer burn and save space until you are ready to bake.
Tall Fluffy Homemade Biscuits

Ingredients:
Instructions:
Nutrition Facts:
| Calories | 297 kcal |
|---|---|
| Protein | 5.9 g |
| Fat | 13.3 g |
| Carbs | 37.7 g |
| Fiber | 1.3 g |
| Sugar | 1.8 g |
| Sodium | 440 mg |
