Pumpkin Bread: Velvety and Spice Forward
- Time: Active 15 minutes, Passive 60 minutes, Total 75 minutes
- Flavor/Texture Hook: Velvety, spice forward, and moisture rich
- Perfect for: Holiday gifting, meal prep, or beginner bakers seeking a reliable win
- Mastering This Reliable Pumpkin Bread Recipe
- Science Behind the Velvety Crumb
- Component Analysis and Ingredient Roles
- Essential Tools for Precise Baking
- Step-by-Step Method for Success
- Solving Common Baking Structural Issues
- Flavor Variations and Ingredient Swaps
- Proper Storage and Waste Reduction
- Finishing Touches for Visual Appeal
- Kitchen Myths and Truths
- Recipe FAQs
- 📝 Recipe Card
Mastering This Reliable Pumpkin Bread Recipe
You know that specific, warm aroma that hits you the second you walk into a local bakery in October? That scent of toasted cinnamon and earthy pumpkin is exactly what we are achieving here.
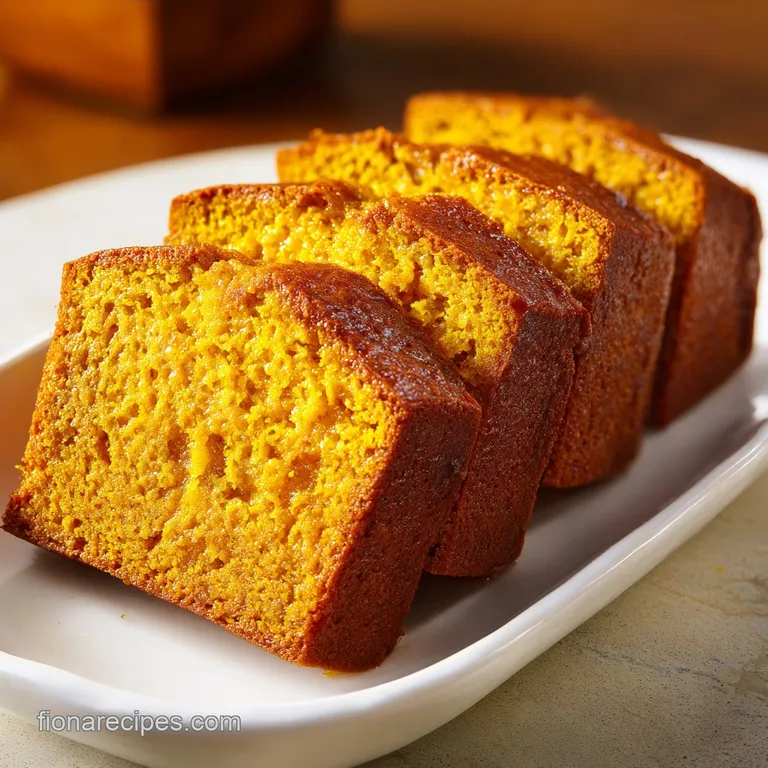
This isn't one of those breads that looks beautiful on the outside but turns into a dry, crumbly mess the moment you take a serrated knife to it. We are going for a texture that is dense yet tender, with a crumb so stable it won't fall apart when you slather it with cold butter.
The secret to this specific pumpkin bread recipe lies in the way we handle the fats and sugars before the flour ever touches the bowl. Most people just toss everything together, but we are going to build a stable emulsion. Think of it like building a foundation for a house.
If the sugar doesn't properly dissolve into the oil and eggs, you end up with a grainy texture and a top that feels sticky rather than soft. We want that glossy, uniform batter that looks like melted copper.
By the time you pull this out of the oven, your kitchen will smell like a professional spice shop. The crust will have a slight, delicate resistance before giving way to a center that feels almost like custard in its richness.
This is the kind of recipe you keep on a stained index card for twenty years because it just works every single time. It is straightforward, efficient, and delivers a high reward result for very little active effort.
Science Behind the Velvety Crumb
Hygroscopic Balance: The combination of granulated and brown sugar pulls moisture from the air and the pumpkin, keeping the loaf supple long after it cools. This prevents the starch molecules in the flour from crystallizing and becoming stale.
Fat Based Tenderizing: Using neutral oil instead of butter ensures the bread stays soft even when cold, as oil remains liquid at room temperature. This coats the flour proteins, preventing excessive gluten development and ensuring a tender bite.
Maillard Reaction Control: Baking at 325°F instead of the standard 350°F allows the sugars to caramelize slowly without the exterior burning before the dense center is fully cooked. This results in a more uniform color and a deeper flavor profile.
Spice Blooming: Adding the cinnamon, nutmeg, and cloves directly to the wet ingredients allows the fat soluble flavor compounds in the spices to dissolve. This "blooms" the aromatics, spreading the flavor more evenly than if they were tossed in with the dry flour.
| Cooking Method | Cook Time | Texture Result | Best For |
|---|---|---|---|
| Standard Oven (325°F) | 60 minutes | Even crumb, soft crust | Everyday reliable baking |
| Dutch Oven (Stovetop) | 75 minutes | Denser, more steamed | Camping or no oven setups |
| Convection Oven | 50 minutes | Higher dome, crisper edges | Those who like a "crusty" loaf |
Selecting the right method depends entirely on your preferred final texture. While the oven is the gold standard for this pumpkin bread recipe, a heavy bottomed Dutch oven on a over low heat stovetop can mimic a professional oven by trapping steam, though it lacks the beautiful browning of a traditional bake. If you enjoy this moisture rich crumb, you'll also appreciate the texture in my carrot cake recipe, which uses similar chemistry to achieve a soft bite.
Component Analysis and Ingredient Roles
The success of any baked good depends on how the individual components interact under heat. In this loaf, the pumpkin puree acts as more than just flavor; it provides the bulk of the hydration and structure.
Without the fiber from the pumpkin, the high fat content from the oil would make the bread feel greasy rather than moist.
| Ingredient | Science Role | Pro Secret |
|---|---|---|
| Pumpkin Puree (1 cup) | Provides fiber and moisture | Use "solid pack" puree, not watery homemade blends |
| Neutral Oil (1/2 cup) | Inhibits gluten formation | Grapeseed oil offers the cleanest flavor profile |
| Brown Sugar (1/2 cup) | Adds acidity for leavening | Pack it tightly to ensure correct moisture ratios |
| Baking Soda (1 tsp) | Reacts with acids to lift | Check freshness by adding a pinch to vinegar first |
Precision in measurement is non negotiable here. I always recommend using a kitchen scale to measure your 220g of all purpose flour. Scooping with a measuring cup often packs the flour down, leading to a heavy, dry loaf that lacks that signature velvety feel.
Even a 10% error in flour weight can turn a masterpiece into a brick.
Essential Tools for Precise Baking
To get that professional looking crack right down the center of your loaf, you need the right gear. A standard 9x5 inch loaf pan is the target here. If you use a smaller 8x4 inch pan, the batter will likely overflow or the center will remain raw while the edges burn.
I prefer a light colored metal pan over glass or dark non stick. Light metal reflects heat more evenly, preventing the bottom of your bread from becoming a dark, tough skin before the middle is set.
A silicone spatula is also your best friend during the folding phase. Unlike a whisk, which can beat too much air into the batter or overwork the gluten, a spatula allows you to gently incorporate the flour. This keeps the internal structure light. You'll also want a wire cooling rack.
Leaving the hot bread in the pan for too long causes steam to collect at the bottom, which results in a "gummy" base. Moving it to a rack ensures air circulates around the entire loaf, setting the crust perfectly.
step-by-step Method for Success

Preheat your oven to 325°F (165°C) and grease a 9x5 inch loaf pan. Note: I usually line the bottom with a strip of parchment paper for a "sling" effect to make removal easier.
Combine 1 cup pumpkin puree, 1/2 cup oil, 2 eggs, 1 cup granulated sugar, 1/2 cup brown sugar, and 1/4 cup milk in a large bowl.
Whisk this mixture for exactly 2 minutes until the batter is glossy and the sugars are mostly dissolved. This creates the emulsion needed for a smooth crumb.
Add 2 tsp cinnamon, 1/2 tsp nutmeg, 1/4 tsp cloves, and 1/2 tsp salt directly into the wet mix. Whisk until the spices are fully integrated and the color is uniform.
Sift together 1 3/4 cups all purpose flour and 1 tsp baking soda in a separate small bowl. Note: Sifting prevents "soda pockets" which taste bitter and soapy.
Gently fold the dry ingredients into the wet mixture using a spatula. Stop as soon as no white streaks remain. Overmixing at this stage will make the bread tough.
Pour the velvety batter into your prepared pan. Tap the pan firmly on the counter twice to release any large trapped air bubbles.
Place the pan on the center rack of the oven. Bake for 60 minutes.
Check doneness by inserting a skewer. It should come out clean or with a few moist crumbs, but no wet batter.
Let the loaf rest in the pan for 15 minutes. Transfer to a wire rack to cool completely before slicing to allow the internal structure to set.
Solving Common Baking Structural Issues
Preventing a Sunken Center
A sunken middle usually happens for one of two reasons: either the oven door was opened too early, causing a sudden temperature drop, or the leavening agent was expired. Baking soda relies on the initial burst of heat to create carbon dioxide bubbles.
If that heat is interrupted, the structure collapses before it is strong enough to hold its own weight.
Avoiding a Gummy Bottom
If your bread feels damp or "rubbery" at the very bottom, it’s usually because of "settling." This happens if the batter is too thin or if the loaf wasn't moved to a cooling rack quickly enough. Steam trapped between the pan and the bread reverts back to water, saturating the bottom layer.
Always ensure your pumpkin puree isn't overly watery; if it is, strain it through a paper towel for 5 minutes before using.
| Problem | Root Cause | Solution |
|---|---|---|
| Large holes in crumb | Overmixing the flour | Fold gently until just combined |
| Bitter aftertaste | Clumped baking soda | Sift soda with flour before adding |
| Burnt edges, raw middle | Oven temp too high | Use an oven thermometer to verify 325°F |
Common Mistakes Checklist
- ✓ Use "Solid Pack" pumpkin, not pumpkin pie filling which has added sugar and water.
- ✓ Ensure eggs are at room temperature to help the oil and milk emulsify correctly.
- ✓ Don't skip the 2 minute whisking step; it’s vital for the glossy texture.
- ✓ Measure flour by weight (220g) to avoid a dry, heavy loaf.
- ✓ Let the oven preheat for at least 20 minutes before the pan goes in.
- ✓ Resist the urge to slice the bread while it is steaming hot; it will tear.
Flavor Variations and Ingredient Swaps
While the classic version is hard to beat, this pumpkin bread recipe is incredibly versatile. If you want to lean into the dessert side of things, adding 1 cup of semi sweet chocolate chips is a classic move. For those craving a deeper cocoa hit, these velvet chocolate bars use a similar emulsion technique to achieve that melt in-your mouth quality. The fat in this recipe holds onto the chocolate perfectly, preventing the chips from sinking to the bottom.
If you prefer a more "old-fashioned" vibe, try adding 1/2 cup of toasted, chopped pecans or walnuts. The crunch of the nuts provides a beautiful contrast to the velvety crumb. You can also swap the ground cloves for ground ginger if you prefer a brighter, more peppery spice profile.
Some bakers like to add a "crunchy top" by sprinkling a tablespoon of turbinado sugar over the batter just before it goes into the oven.
| Original Ingredient | Substitute | Why It Works |
|---|---|---|
| Neutral Oil (1/2 cup) | Melted Butter (1/2 cup) | Adds a rich, toasted flavor but results in a firmer loaf |
| Whole Milk (1/4 cup) | Plain Yogurt (1/4 cup) | Increases acidity, resulting in a more dramatic rise |
| All Purpose Flour | 1:1 gluten-free Blend | Rice based blends mimic the structure well in moist loaves |
Proper Storage and Waste Reduction
This loaf is one of the rare baked goods that actually tastes better on the second day. As it sits, the spices continue to hydrate, and the moisture redistributes from the center to the crust. I recommend wrapping the completely cooled loaf tightly in plastic wrap and keeping it at room temperature for up to 4 days.
If you find you can't finish it that quickly, it stays fresh in the fridge for about a week, though the cold can make the texture feel slightly firmer.
For long term storage, this bread freezes beautifully. I like to slice the loaf first, place pieces of parchment paper between the slices, and then freeze the whole thing in a heavy duty freezer bag for up to 3 months. This allows you to pull out a single slice and pop it directly into the toaster.
To reheat, a low setting on the toaster or 15 seconds in the microwave will return it to that "just baked" softness.
Don't let any scraps go to waste. If you have a few dry end pieces, tear them up and use them as a base for a pumpkin bread pudding. You can also toast cubes of leftover bread in a pan with a little butter to make "dessert croutons" for a bowl of vanilla bean ice cream.
If you have leftover pumpkin puree in the can, freeze it in an ice cube tray; each cube is usually about 2 tablespoons, perfect for adding to oatmeal or smoothies later.
Finishing Touches for Visual Appeal
To give your loaf that professional "bakery window" look, you can focus on the topping. A simple maple glaze made from powdered sugar and a splash of real maple syrup can be drizzled over the top once the bread is fully cooled. This adds a shatter like sweetness to every bite.
Alternatively, a thin layer of cream cheese frosting makes this feel less like a snack bread and more like a decadent dessert.
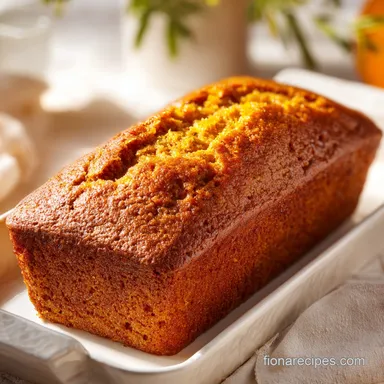
If you want a rustic look, skip the glazes and focus on the "bloom." By taking a sharp knife dipped in melted butter and running it down the center of the batter 10 minutes into the baking process, you can encourage a perfectly straight, beautiful crack.
This looks much more intentional than the random cracks that usually form. Serve your slices with a sprinkle of flaky sea salt to balance the sugars and make the warm spices really pop on the palate.
Decision Shortcut for Texture
- If you want a tighter, more "pound cake" crumb, use 1/4 cup less oil and add one extra egg yolk.
- If you want a darker, more caramelized crust, swap all granulated sugar for extra dark brown sugar.
- If you want a spice forward loaf that tingles, double the ground ginger and black pepper.
Kitchen Myths and Truths
One common myth is that using fresh pumpkin you roasted yourself will result in a better loaf. In reality, fresh pumpkin varies wildly in water content and fiber density. Most professional bakers actually prefer the consistency of canned "solid pack" pumpkin because the moisture levels are standardized.
If you do use fresh, you must strain it through cheesecloth, or your bread will likely end up with a gummy, wet texture that never quite sets in the center.
Another misconception is that "more pumpkin equals more moist." This is actually a recipe for disaster. Adding too much puree throws off the ratio of flour to moisture, leading to a heavy loaf that collapses under its own weight.
The 1 cup of puree specified in this pumpkin bread recipe is the "sweet spot" that provides maximum flavor without compromising the structural integrity of the crumb. Stick to the measurements, and the science will take care of the rest.

Recipe FAQs
What are common pumpkin bread mistakes?
Overmixing the flour is the biggest culprit. Once you add the dry ingredients, fold them in gently just until combined to prevent the bread from becoming dense or rubbery.
Is it better to use butter or oil in pumpkin bread?
Use a neutral oil, such as vegetable, canola, or grapeseed. Oil keeps the crumb moist for several days, whereas butter can cause the loaf to become firm or dry when stored in the refrigerator.
What ingredients do you need for pumpkin bread?
Gather your pumpkin puree, neutral oil, eggs, granulated sugar, brown sugar, milk, flour, baking soda, salt, cinnamon, nutmeg, and cloves. Ensure your eggs are at room temperature to facilitate a smooth emulsion during the mixing process.
Can I add canned pumpkin to a pumpkin bread mix?
No, this is a common misconception. Commercial mixes are formulated with specific ratios, and adding extra moisture can lead to a gummy or undercooked center.
How to achieve the perfect glossy batter?
Whisk the wet ingredients for exactly two minutes. This specific timeframe ensures the sugars dissolve and the oil emulsifies, creating the structure for a tender crumb. If you enjoyed Recipe for 12 Servings here, you will find the same principle is essential for achieving a smooth, consistent base in our cheesecake recipe.
How to tell if the pumpkin bread is done baking?
Insert a skewer into the center of the loaf. If the skewer comes out clean without wet batter clinging to it, the bread is fully baked through.
How to properly store the finished loaf?
Cool the bread completely on a wire rack before wrapping it tightly. Storing it while still warm will trap steam, causing the crust to become soggy instead of maintaining its texture.
Moist Pumpkin Bread
Ingredients:
Instructions:
Nutrition Facts:
| Calories | 317 kcal |
|---|---|
| Protein | 3.9 g |
| Fat | 12.4 g |
| Carbs | 48.4 g |
| Fiber | 1.1 g |
| Sugar | 31.2 g |
| Sodium | 242 mg |
