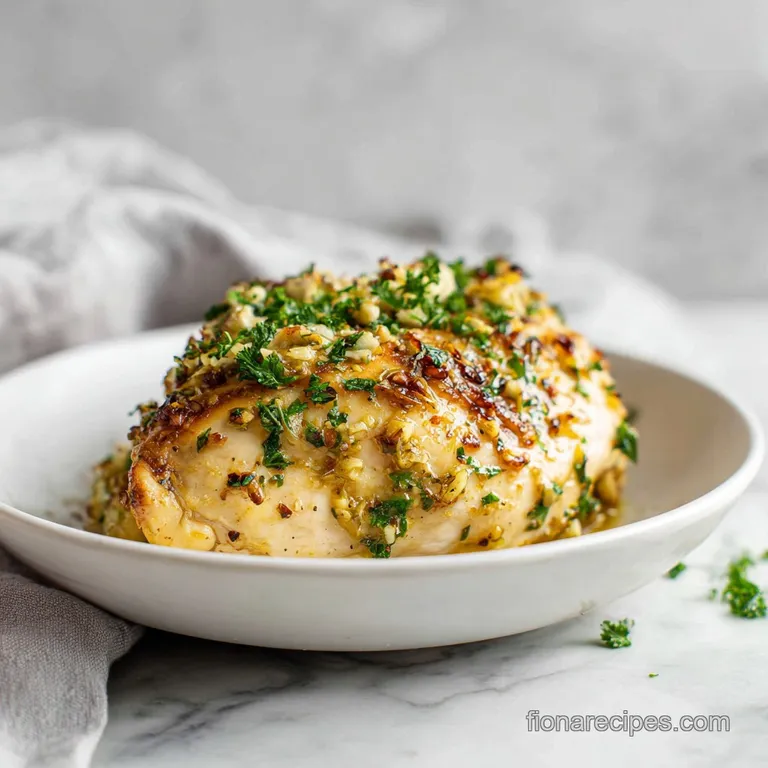
Garlic Butter Baked Chicken: Bistro Style
- Time: Active 15 minutes, Passive 25 minutes, Total 40 minutes
- Flavor/Texture Hook: Silky, garlic drenched meat with a smoky, shatter crisp paprika crust
- Perfect for: Stress free family dinners and reliable weeknight meal prep
- Easy Garlic Butter Baked Chicken Masterclass
- Essential Techniques for Juicy Results
- Analyzing Our Core Ingredients
- The Budget-Friendly Component List
- Essential Tools for Roasting
- Step by Step Instructions
- Fixing Common Roasting Issues
- Adapting the Recipe for Groups
- Debunking Kitchen Myths
- Storage and Zero Waste Tips
- Creative Pairing Ideas
- Recipe FAQs
- 📝 Recipe Card
Easy Garlic Butter Baked Chicken Masterclass
The moment you slide the tray into the oven, the transformation begins. Within ten minutes, the sharp, pungent scent of raw garlic mellows into a nutty, sweet aroma that fills every corner of the house.
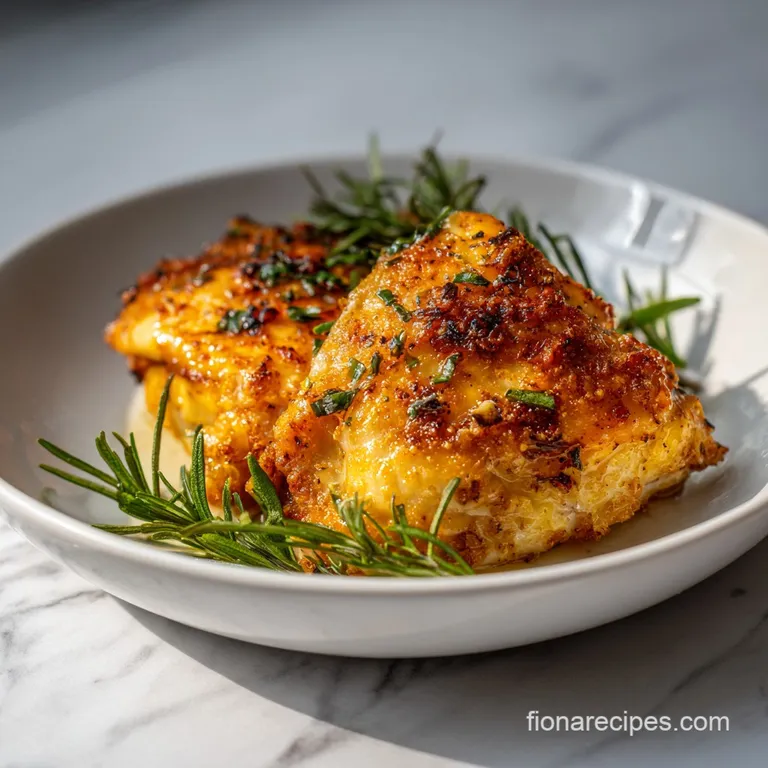
You'll hear that gentle, rhythmic sizzle as the butter melts off the top of the breast, pooling around the edges and frying the smoked paprika into a vibrant, crimson oil. It is the kind of kitchen smell that brings people wandering into the room asking, "When is dinner?"
I remember the first time I tried a version of this. I was so worried about the chicken being bland that I practically drowned it in lemon juice, only to end up with something that tasted like a sour sponge. I learned the hard way that balance is everything.
This version is the result of stripping away the fuss and focusing on a heavy duty coating that stays put. It is not just about flavor, it is about creating a protective environment so the protein stays fork tender.
You are going to love how the butter creates this velvety sauce right on the pan. There is no need to make a separate gravy or reduction. When you pull the tray out, the chicken is glistening, and that garlic heavy liquid is just waiting to be spooned over a pile of mash or some crusty bread.
It is simple, it is hearty, and honestly, it is the most reliable way I know to cook chicken breast without it turning into cardboard.
Essential Techniques for Juicy Results
Understanding the "why" behind the steps makes you a better cook without needing a degree. We are essentially using fat and temperature to manipulate the protein structure.
- The Moisture Seal: Butter acts as a physical barrier. By coating the meat in a thick compound paste, you slow down the evaporation of internal juices, ensuring the center stays succulent while the outside roasts.
- Acidic Tenderization: A small amount of lemon juice is included not just for tang, but to gently break down the tough surface fibers. This allows the garlic and oregano notes to penetrate deeper into the meat during the 25 minutes of roasting.
- The 400°F Strategy: Cooking at 200°C (400°F) is the "sweet spot" for chicken. It is hot enough to trigger browning and render the butter fats quickly, but fast enough that the internal temperature reaches safety before the exterior becomes leathery.
- Protein Relaxation: Resting the meat is non negotiable. When you pull the chicken at 160°F, the fibers are tight and holding onto moisture. Five minutes of resting allows those fibers to relax and reabsorb the juices, ensuring they don't all spill out the second you slice into it.
| Meat Thickness | Internal Temp | Rest Time | Visual Cue |
|---|---|---|---|
| 1.5 cm (Thin) | 160°F (71°C) | 3 minutes | Opaque throughout |
| 2.5 cm (Standard) | 160°F (71°C) | 5 minutes | Golden butter bubbles |
| 4 cm (Thick) | 160°F (71°C) | 8 minutes | Firm but gives slightly |
This quick decision guide ensures you never overcook your Garlic Butter Baked Chicken regardless of how the butcher sliced the breasts. Consistency is the secret to a stress free kitchen, and using a thermometer is the only way to be 100% sure every single time.
Analyzing Our Core Ingredients
Every component in this dish serves a functional purpose. We aren't just adding things for the sake of a long list; we are building layers of flavor and texture that work in harmony.
| Ingredient | Science Role | Pro Secret |
|---|---|---|
| Unsalted Butter | Fat & Emulsion | Use room temp butter to ensure it mashes into a thick paste rather than melting off too fast. |
| Smoked Paprika | Color & Depth | This provides a "roasted" look and a hint of wood smoke flavor without needing a grill. |
| Fresh Garlic | Aromatic Base | Mince it finely so it distributes evenly; large chunks can burn and turn bitter in a hot oven. |
| Lemon Juice | Ph Balancer | The bright acidity cuts through the heavy fat of the butter, making the dish feel lighter. |
Using the right fat is crucial for the flavor profile. While oil is great for over high heat searing, butter provides a richness that oil simply can't match. If you are looking for more ways to use these flavors, you might enjoy my Garlic Parmesan Chicken Pasta which uses a similar aromatic base but in a creamy sauce format.
The Budget Friendly Component List
Cooking real food for a family doesn't have to break the bank. This recipe relies on pantry staples and smart shopping to keep costs low while delivering high end results.
- 1.5 lbs boneless skinless chicken breasts: The star of the show. Why this? It's lean, high in protein, and picks up the garlic flavor beautifully.
- Substitute: Chicken thighs (boneless or bone in). They are often cheaper and more forgiving if overcooked.
- 4 tbsp unsalted butter: Softened to room temperature. Why this? Provides the "basting" liquid that keeps the meat moist.
- Substitute: Margarine or a vegan butter stick. Note: This will slightly change the richness but keeps the moisture level high.
- 4 cloves garlic: Finely minced. Why this? Delivers the punchy flavor that defines the dish.
- Substitute: 1 tsp garlic powder. It works in a pinch, though you lose the fresh "bite."
- 1 tsp smoked paprika: For that golden hue. Why this? It adds a complex, earthy note without heat.
- Substitute: Sweet paprika or a pinch of chili powder if you want a little kick.
- 1 tbsp fresh Italian parsley: Finely chopped. Why this? Adds a pop of color and a fresh, peppery finish.
- Substitute: 1 tsp dried parsley or fresh cilantro for a different flavor profile.
- 0.5 tsp dried oregano: The herbal backbone. Why this? It stands up well to high oven heat without burning.
- Substitute: Dried thyme or Italian seasoning blend.
- 1 tsp fresh lemon juice: The necessary acid. Why this? It "wakes up" all the other spices.
- Substitute: Apple cider vinegar or white wine vinegar.
- 1 tsp fine sea salt & 0.5 tsp black pepper: Essential seasoning. Why this? To enhance every other ingredient in the bowl.
- Substitute: Kosher salt or lemon pepper.
Essential Tools for Roasting
You don't need a professional kitchen to make a great meal, but having the right basic gear makes the process much smoother.
- Rimmed Baking Sheet: Essential for catching all those delicious butter juices. A flat cookie sheet will result in a messy oven floor, so make sure yours has at least a 2 cm rim.
- Instant Read Thermometer: This is the single most important tool in your kit. It takes the guesswork out of "is it done?" and prevents dry, rubbery meat.
- Small Mixing Bowl: For mashing your compound butter.
- Paper Towels: Often overlooked, but critical for drying the chicken so the butter actually sticks instead of sliding off.
step-by-step Instructions
- Preheat your oven to 400°F (200°C). Grab your chicken and pat it completely dry with paper towels. Note: Surface moisture is the enemy of a good crust; the butter won't stick to wet meat.
- Season both sides of the 1.5 lbs of chicken breasts aggressively with 1 tsp salt, 0.5 tsp black pepper, and 1 tsp smoked paprika.
- In a small bowl, combine 4 tbsp softened butter, 4 minced garlic cloves, 1 tbsp chopped parsley, 0.5 tsp dried oregano, and 1 tsp lemon juice.
- Mash the mixture with a fork until it forms a uniform, thick compound butter paste.
- Coat every inch of the chicken with the garlic butter paste. Use your hands or a brush to ensure it is thick and even on both sides.
- Arrange the chicken on a rimmed baking sheet or in a cast iron skillet. Make sure the pieces aren't touching to allow air to circulate.
- Bake for 18 to 22 minutes. Check the thickest part of the breast with your thermometer.
- Pull the chicken out of the oven when it reaches an internal temperature of 160°F (71°C). It will look golden and the butter will be sizzling.
- Transfer the chicken to a clean plate or cutting board and let it rest for 5 minutes.
- Spoon the remaining butter juices from the pan over the meat before serving.
Fixing Common Roasting Issues
Even the simplest recipes can go sideways if the details are missed. Don't worry if your first batch wasn't "perfect" cooking is a skill we build over time.
Why Your Garlic Tastes Bitter
If you find the garlic flavor is too harsh or has a burnt, bitter aftertaste, it is usually because the garlic was chopped too coarsely or the oven had "hot spots." Tiny bits of garlic can scorch if they aren't fully integrated into the butter fat.
Next time, try using a microplane to create a garlic paste, which blends into the butter more seamlessly and protects the garlic from direct heat.
Rescuing Dry Chicken Breasts
If you accidentally left the chicken in too long and it feels a bit like a shoe, don't throw it out! The fix is in the pan. Take those leftover garlic butter juices, add a splash of chicken broth or even a little more melted butter, and slice the chicken thin. Toss the slices in that liquid.
The fat and moisture will help mask the dryness and make the meat much more palatable.
| Problem | Root Cause | Solution |
|---|---|---|
| Butter all on pan, not chicken | Chicken was wet when seasoned | Pat meat bone dry with paper towels before starting. |
| Coating looks burnt | Oven rack too high | Move rack to the center position for even heat distribution. |
| Meat is "rubbery" | Sliced too soon | Let it rest for a full 5 minutes to allow fibers to relax. |
Common Mistakes Checklist
- ✓ Never skip the pat dry step; it is the difference between a crust and a steam.
- ✓ Ensure the butter is truly soft (room temp), not melted, before mixing.
- ✓ Check your oven temperature with an external thermometer to ensure it's actually 400°F.
- ✓ Don't overcrowd the pan; leave at least 2 cm of space between breasts.
- ✓ Always use the pan drippings; that is where 50% of the flavor lives!
Adapting the Recipe for Groups
When you are cooking for more than four people, you can't just double everything and hope for the best. The way heat moves through a crowded oven changes the timing.
- Scaling Down: If you're only cooking for one or two, use a smaller pan like a toaster oven tray or a small cake pan. This keeps the butter juices from spreading too thin and burning on a large sheet. Reduce the cook time by about 3-5 minutes and start checking early.
- Scaling Up: For a crowd (8-10 people), use two separate baking sheets. If you crowd too much chicken onto one tray, they will steam each other and you'll lose that beautiful roasted texture. Increase the salt and spices to 1.5x rather than a full 2x to avoid over seasoning, and rotate the pans halfway through the 25 minutes.
| Servings | Chicken Amount | Pan Size | Cook Time |
|---|---|---|---|
| 2 People | 0.75 lbs | 8 inch skillet | 15-18 minutes |
| 4 People | 1.5 lbs | Standard sheet pan | 18-22 minutes |
| 8 People | 3 lbs | Two sheet pans | 22-26 minutes |
If you're looking for a version that's even easier for a massive crowd, my Slow Cooker Crack Chicken is a great alternative since it handles large volumes with zero active monitoring.
Debunking Kitchen Myths
There are a lot of old wives' tales in the cooking world that actually make our jobs harder. Let's clear some up so you can cook with confidence.
- Myth: You need to wash chicken before cooking it to remove bacteria.
- Truth: Rinsing chicken actually spreads bacteria around your sink and counters via splashing. The high heat of a 200°C oven is what kills the bacteria. Plus, washing makes the skin wet, which ruins our goal of a butter crust.
- Myth: You must wait until 165°F to pull chicken from the oven.
- Truth: If you pull at 165°F, it will climb to 170°F or higher while resting, leading to dry meat. Pulling at 160°F is safe because "carry over cooking" will bring it to the FDA recommended 165°F while it sits on the counter.
- Myth: Searing first is the only way to get a golden color.
- Truth: While searing is great, a high temperature bake (400°F) combined with the sugars in the butter and the pigment in the paprika will create a beautiful golden brown finish without the extra stovetop mess.
Storage and Zero Waste Tips
The best part of this Garlic Butter Baked Chicken is that it actually tastes better the next day after the garlic has really mellowed into the meat.
- Fridge Storage: Store leftovers in an airtight container for up to 4 days. Keep the pan juices! Pour them over the chicken before sealing the container to keep it moist.
- Freezing: You can freeze the cooked chicken for up to 3 months. I recommend slicing it first so it thaws faster. Wrap it tightly in foil and then place it in a freezer bag to prevent freezer burn.
- Reheating: Avoid the microwave if possible; it turns chicken into rubber. Instead, place it in a pan with a splash of water or broth, cover with foil, and heat at 350°F (180°C) for 10 minutes.
- Zero Waste: Don't toss those juices! If you have leftover butter liquid on the pan, toss it with some boiled pasta or use it to sauté some spinach the next day. If you used skin on chicken, save the bones in a bag in the freezer to make a quick garlic infused chicken stock later.
Creative Pairing Ideas
To turn this into a full meal, you want sides that can stand up to the boldness of the garlic without fighting it.
- The Comfort Route: Serve over a bed of creamy mashed potatoes or rice pilaf. The starches will soak up the garlic butter like a sponge.
- Light and Bright: A simple arugula salad with a lemon vinaigrette provides a peppery, acidic contrast to the rich butter.
- The Roasted Medley: Throw some broccoli florets or asparagus spears onto the same baking sheet for the last 10 minutes of cooking. They will roast in the chicken drippings and taste phenomenal.
- Mediterranean Flare: Add some halved cherry tomatoes and Kalamata olives to the pan during the last 5 minutes of baking for a "sheet pan" style meal that feels like a vacation.
This Garlic Butter Baked Chicken is a staple for a reason. It's honest, real food that doesn't demand hours of your life but gives you a result that feels special every time you put it on the table. Trust the thermometer, don't skimp on the butter, and enjoy the sizzle!

Recipe FAQs
How to make garlic butter roasted chicken?
Preheat your oven to 400°F and pat the chicken completely dry. Season the meat with salt, pepper, and smoked paprika, then coat every inch with a compound butter paste made from softened butter, minced garlic, parsley, oregano, and lemon juice.
Bake on a rimmed sheet for 18 22 minutes until the internal temperature hits 160°F.
What are the common mistakes in garlic butter?
Using melted butter instead of softened room temperature butter is the biggest error. You need the fat to remain a paste so it clings to the chicken rather than sliding off onto the pan, which prevents the garlic from properly infusing the meat.
Is it better to bake chicken at 350 or 400 for how long?
Stick with 400°F for 18 22 minutes. This higher temperature ensures the butter mixture bubbles and browns quickly, creating flavor without drying out the chicken breast.
How to cook garlic chicken in the oven?
Arrange the chicken pieces on a rimmed baking sheet so they do not touch. Ensuring each piece has room for air circulation allows the heat to hit the surface evenly, giving you that golden, buttery crust.
Is it necessary to rest the chicken after baking?
Yes, always rest for 5 minutes. This allows the internal temperature to coast up to the safe 165°F mark and keeps the juices locked inside the meat. If you enjoyed the Recipe in 20 Minutes, you will find this resting stage follows the same logic of allowing fibers to relax.
Can I store this chicken for later?
Keep leftovers in an airtight container for up to 4 days. Be sure to pour the pan juices over the chicken before sealing, as this liquid prevents the breast meat from drying out in the refrigerator.
Does the chicken need to be completely dry before adding butter?
Absolutely, moisture is the enemy of a good crust. If you leave surface water on the chicken, the butter mixture will just steam off the meat rather than adhering to it and creating a rich, flavorful coating.
Garlic Butter Baked Chicken
Ingredients:
Instructions:
Nutrition Facts:
| Calories | 312 kcal |
|---|---|
| Protein | 38.6 g |
| Fat | 15.8 g |
| Carbs | 1.4 g |
| Fiber | 0.3 g |
| Sugar | 0.2 g |
| Sodium | 598 mg |
