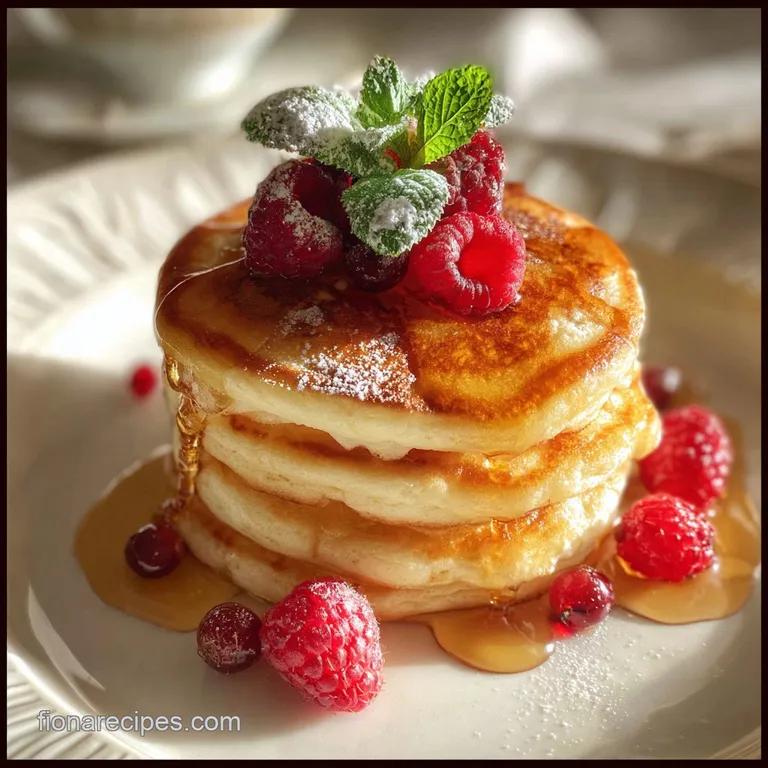
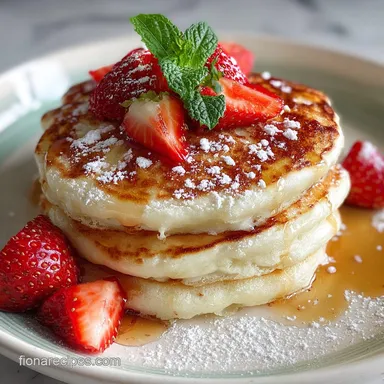
Fluffy Pancakes from Scratch: Cloud-Like Rounds
- Time: Active 5 minutes, Passive 10 minutes, Total 15 minutes
- Flavor/Texture Hook: Golden brown buttery edges with a velvety, airy center
- Perfect for: Lazy Saturday mornings, kid approved brunches, or breakfast for-dinner nights
- Making Fluffy Pancakes From Scratch For Families
- The Physics of the Rise
- Essential Metrics for Perfect Batters
- The Essential Pancake Ingredient List
- Tools Needed for Fluffy Results
- The Step-by-Step Cooking Process
- Fixing Common Griddle Problems
- Diet Swaps and Simple Adjustments
- Saving Leftovers for Later Meals
- Debunking Pancake Preparation Myths
- Best Toppings and Side Dishes
- High in Sodium
- Recipe FAQs
- 📝 Recipe Card
Making Fluffy Pancakes From Scratch For Families
There is a specific sound that defines a good morning in my house. It is the rhythmic whisking of a fork against a ceramic bowl followed by the unmistakable sizzle of cold batter hitting a hot, buttered cast iron surface. I remember the first time I tried making these for my kids.
I was so obsessed with getting the batter smooth that I whisked it until it looked like heavy cream. The result? Leathery, flat discs that we ended up feeding to the dog. It was a humbling moment for a home cook who thought she knew it all.
I quickly realized that the secret to those towering, diner style stacks is actually found in the lumps. Yes, those little clumps of flour you feel the urge to whisk away are actually the guardians of your texture. When I finally learned to put the whisk down and back away from the bowl, the kitchen transformed.
The aroma of toasted butter and vanilla extract filled the air, and for the first time, my spatula slipped under a cake that was actually thick enough to hold its own weight.
This recipe is the culmination of dozens of "failed" weekend experiments. We are talking about real food that fits into a busy weeknight or a slow Sunday. You don't need buttermilk or fancy equipment. You just need a few basic ingredients and the patience to wait for the bubbles to tell you when it's time to flip.
Trust me, once you see that golden brown shatter on the edges, you will never go back to a plastic bottle of pre made mix again.
The Physics of the Rise
Double Action Lift: This recipe uses both baking powder and baking soda to create immediate air bubbles upon contact with liquid and a second rise when the heat hits the griddle.
Gluten Management: Keeping the batter lumpy prevents the flour proteins from knitting together too tightly, ensuring a tender crumb rather than a chewy, bread like texture.
| Method | Time | Texture | Best For |
|---|---|---|---|
| Cast Iron Skillet | 10 mins | Crispy, buttery edges | Achieving that classic diner style crust |
| Electric Griddle | 8 mins | Uniform golden color | Cooking for the whole family at once |
| Oven (Sheet Pan) | 15 mins | Consistent, cake like | Meal prepping for the school week |
The choice of cooking surface significantly impacts the final sensory experience of your breakfast. While a skillet offers that traditional sizzle and uneven, beautiful browning, the electric griddle provides a level of heat control that is hard to beat when you are juggling multiple servings.
Essential Metrics for Perfect Batters
When we talk about making fluffy pancakes from scratch, precision matters more than you might think for such a simple dish. To get that consistent rise every time, I follow three specific numeric checkpoints that never steer me wrong.
First, your griddle should be exactly 375°F; if it is lower, the pancakes will soak up oil and become heavy. If it is higher, the outside will burn before the middle sets.
Second, watch the clock for the two minute mark. This is usually when the bubbles around the edges transition from wet to "set." Finally, if you are a real stickler for doneness, use an instant read thermometer to check for an internal temperature of 190°F.
This ensures the center is fully cooked and velvety rather than gummy.
Proportional Scaling Guidelines
If you need to feed a crowd or just yourself, scaling this recipe requires a little bit of math. For a half batch, beat the single egg in a small cup first, then use exactly half of it by weight or volume.
When doubling the recipe, do not double the salt or vanilla extract; instead, use 1.5 times the amount to keep the flavors from becoming overwhelming.
For large batches, work in groups of four to keep the pan temperature stable. Adding too much cold batter to a skillet at once will cause the surface temperature to plummet, leading to pale, greasy results.
The Essential Pancake Ingredient List
| Component | Science Role | Pro Secret |
|---|---|---|
| All Purpose Flour | Provides structure | Sift it twice to incorporate extra air before mixing |
| Whole Milk | Hydration and fat | Room temperature milk prevents the butter from re clumping |
| Baking Soda | Browning and lift | It reacts with the tiny bit of acid in the milk for fluff |
- 2 cups all purpose flour: The foundation of the structure. Why this? AP flour has the right protein balance for a soft yet sturdy crumb.
- 3 tbsp granulated sugar: For sweetness and browning. Why this? Sugar carmelizes on the heat, creating those beautiful golden brown rings.
- 2 tsp baking powder: The primary lifting agent. Why this? It provides the initial gas bubbles that make the batter expand.
- 1 tsp baking soda: For extra height and color. Why this? It helps neutralize the batter and speeds up the Maillard reaction.
- 0.5 tsp fine sea salt: Enhances every other flavor. Why this? Without salt, the flour and milk will taste flat and dull.
- 1.5 cups whole milk: The liquid binder. Why this? Whole milk adds richness that skim milk simply cannot replicate.
- 1 large egg: Provides protein and stability. Why this? It holds the bubbles in place so the pancake doesn't collapse.
- 4 tbsp unsalted butter: Melted and cooled for moisture. Why this? Fat coats the flour, preventing excessive gluten development.
- 1 tsp pure vanilla extract: For that nostalgic aroma. Why this? It rounds out the sweetness and masks the taste of the leavening.
| Original Ingredient | Substitute | Why It Works |
|---|---|---|
| Whole Milk | Plain Yogurt (thinned) | Adds a tangy depth. Note: Batter will be much thicker |
| Granulated Sugar | Honey or Maple Syrup | Adds moisture and floral notes. Note: Brown faster in the pan |
| Unsalted Butter | Melted Coconut Oil | Creates a subtle tropical aroma. Note: Edges will be extra crispy |
Tools Needed for Fluffy Results
You don't need a high end kitchen to pull this off, but a few specific tools make the process stress free. I always reach for a heavy bottomed skillet, preferably cast iron. The heat retention in a Lodge cast iron pan is unmatched, which means once you get it hot, it stays hot even when the cold batter hits it.
A wide, thin spatula is your best friend here. You want something that can slide easily under the delicate edges without tearing them. I also suggest using a mechanical ice cream scoop or a 1/4 cup measuring cup to portion the batter.
This ensures every pancake is the same size, which means they all cook at the exact same rate.
Chef's Tip: If you don't have a kitchen scale, use the "spoon and level" method for your flour. Never scoop the flour directly with your measuring cup, or you will pack it down and end up with heavy, dry cakes.
The step-by-step Cooking Process

- Whisk the dry elements. Combine the 2 cups all purpose flour, 3 tbsp sugar, 2 tsp baking powder, 1 tsp baking soda, and 0.5 tsp salt in a large bowl. Note: Using a whisk here helps break up any large flour clumps early.
- Prepare the liquids. In a separate jug, whisk the 1.5 cups whole milk, 1 large egg, and 1 tsp vanilla extract until the egg is fully incorporated.
- Melt the butter. Gently melt the 4 tbsp unsalted butter and let it cool for 2 minutes. Note: Adding hot butter to cold milk can cause it to seize into small chunks.
- Combine the mixtures. Pour the wet ingredients and the melted butter into the dry bowl.
- Fold gently. Use a spatula to fold the ingredients together until just combined and still lumpy. Note: Stop as soon as the streaks of dry flour disappear.
- Rest the batter. Let the bowl sit on the counter for 5 minutes. You will see small bubbles forming on the surface as the leavening agents activate.
- Heat the surface. Grease your skillet with a tiny bit of butter or oil and heat over medium. Wait until a drop of water flicked onto the pan sizzles and dances.
- Portion the batter. Scoop 1/4 cup of batter per pancake onto the hot surface, leaving space between them.
- Observe the bubbles. Cook for about 2 minutes until the bubbles on top pop and the edges look matte.
- Execute the flip. Slide the spatula under and flip in one swift motion. Cook for 1 to 2 minutes more until the bottom is deeply golden and the center feels springy.
Fixing Common Griddle Problems
Why Your Center Is Raw
If the outside is perfectly browned but the inside is still a liquid mess, your heat is simply too high. This is the most common mistake for home cooks. The sugar in the batter carmelizes quickly, giving the illusion of doneness.
To fix this, lower the flame immediately and consider finishing the current batch with a lid over the pan for 60 seconds to trap the steam and cook the center.
Why Your Batter Is Thin
Sometimes you measure everything correctly but the batter still runs across the pan like water. This usually happens if your flour has absorbed moisture from the air or if your milk was slightly over measured. You can fix this by sifting in one tablespoon of extra flour at a time.
Be careful not to overmix during this rescue mission, or you will lose the fluffiness you're working so hard for.
| Problem | Root Cause | Solution |
|---|---|---|
| Flat, dense texture | Overmixed batter | Leave the lumps in next time |
| Burnt spots | Unfiltered butter solids | Wipe the pan between batches |
| Tough, chewy bite | Overworked gluten | Let the batter rest for 5-10 mins |
Common Mistakes Checklist
- ✓ Don't press down on the pancake with your spatula after flipping (it squishes out the air).
- ✓ Always wipe the pan with a fresh paper towel between batches to remove burnt butter bits.
- ✓ Avoid using high heat; medium low is the "sweet spot" for most stovetops.
- ✓ Never flip more than once; multiple flips deflate the delicate internal structure.
- ✓ Check the expiration date on your baking powder before you start mixing.
Diet Swaps and Simple Adjustments
For Plant Based Needs
You can easily make these vegan friendly by substituting the whole milk with an unsweetened soy or oat milk. For the egg, a "flax egg" (1 tbsp ground flaxseed mixed with 3 tbsp water) works well, though the pancake will be slightly denser. Replace the butter with a neutral oil like avocado or melted coconut oil.
Transitioning to gluten-free
When using a gluten-free all purpose blend, look for one that contains xanthan gum. gluten-free batters often need an extra 5 minutes of resting time to allow the alternative flours to fully hydrate, preventing a gritty texture.
You might also find you need an extra splash of milk, as GF flours tend to be more absorbent.
If You Want Crispy Edges
If you prefer a "shatter" on the rim of your pancake, increase the butter in the pan significantly. Instead of just greasing the surface, let a small pool of butter sizzle before dropping the batter.
This essentially shallow fries the perimeter of the cake, creating a lace like, crunchy texture that contrasts beautifully with the soft center.
Saving Leftovers for Later Meals
Pancakes are surprisingly resilient when it comes to storage. You can keep cooked leftovers in the fridge for up to 4 days. I recommend placing a small piece of parchment paper between each one to prevent them from sticking together. For long term storage, these are one of the best freezer friendly breakfasts.
Flash freeze them on a baking sheet for an hour before transferring them to a heavy duty freezer bag for up to 2 months.
To reheat, avoid the microwave if you want to maintain the texture. A microwave tends to make them rubbery and soft. Instead, pop them into a toaster on a low setting or heat them in a 350°F oven for 5 minutes. This restores the crispy exterior while gently warming the middle.
| Premium Ingredient | Budget Alternative | Flavor Impact | Savings |
|---|---|---|---|
| Pure Vanilla Bean | Vanilla Extract | Minimal in a batter | Save $15+ |
| Real Maple Syrup | Honey & Butter Mix | Slightly less earthy | Save $8-10 |
| Organic Whole Milk | Store Brand Milk | Negligible | Save $2-3 |
Debunking Pancake Preparation Myths
One of the biggest myths in the breakfast world is that you must use buttermilk for a fluffy pancake. While buttermilk is great, the combination of baking powder and baking soda in this recipe provides more than enough lift on its own.
The acidity in regular whole milk, combined with the leavening agents, creates plenty of carbon dioxide to get that height.
Another common misconception is that the "first pancake" is always destined for the trash. This only happens if you don't preheat your pan properly. If you wait until the surface is truly hot and the oil is shimmering, your very first pancake will be just as golden and beautiful as the last one.
It is all about thermal consistency, not a curse on the first scoop!
Best Toppings and Side Dishes
While maple syrup is the gold standard, don't be afraid to branch out based on what is in your pantry. A dollop of Greek yogurt with a drizzle of honey adds a nice tang and protein boost. For a hearty family meal, I usually serve these with crispy bacon or a simple fruit salad to cut through the richness of the butter.
If you have overripe bananas, mash them up and fold them into the batter at the very last second. Or, for a "real food" treat, toss a handful of fresh blueberries onto the wet side of the pancake before you flip it. This prevents the berries from bleeding into the batter and keeps them whole and juicy.
Whatever you choose, remember that the pancake is simply a canvas for your favorite morning flavors.

High in Sodium
832 mg mg of sodium per serving (36% of daily value)
The American Heart Association recommends limiting sodium intake to no more than 2,300mg per day for most adults. Aiming for 1,500mg per day is even better for heart health.
Tips to Reduce Sodium in Your Pancakes:
-
Reduce Added Salt-25%
Eliminate the fine sea salt entirely. This will significantly reduce the sodium content without drastically impacting the flavor.
-
Baking Powder Check-15%
Some baking powders contain sodium. Check the label and choose a low-sodium or sodium free baking powder to help reduce the sodium content.
-
Milk Matters-10%
Although milk is not very high in sodium, consider using a low-sodium milk alternative like unsweetened almond milk if possible to reduce the sodium content slightly.
-
Unsalted is Key-5%
Make sure you are using truly unsalted butter. Even a small amount of salt from the butter can contribute to the overall sodium level.
-
Flavor Boost
Enhance the flavor of your pancakes with sodium free spices and extracts. Try adding a pinch of cinnamon, nutmeg, or lemon zest for extra flavor.
Recipe FAQs
What is the secret to fluffy pancakes?
Stop overmixing the batter. The small lumps of flour are essential because they prevent tight gluten development, which results in a tender, airy texture rather than a chewy, flat cake.
How to make nice fluffy pancakes from scratch?
Use a double leavening agent system. Combine both baking powder and baking soda, then gently fold your wet and dry ingredients together until just combined, ensuring the batter rests for 5 minutes before hitting a properly preheated 375°F griddle.
What are the three key ingredients in fluffy pancakes?
Flour, Baking Powder, and Whole Milk. The flour provides the structure, baking powder creates the initial lift, and whole milk adds necessary fat and hydration for a tender crumb.
What is the 3:2:1 method for pancakes?
No, this recipe does not use a 3:2:1 method. The focus here is on the double action lift provided by baking powder and soda, and ensuring your griddle temperature remains consistent around 375°F.
Should I press down on the pancakes after flipping them?
No, never press down. Pressing the cooked side with the spatula forces all the trapped air out, immediately deflating the rise you worked to create.
How long should I let the batter rest before cooking?
Rest the batter for 5 minutes on the counter. This resting period allows the leavening agents to activate fully, creating the initial bubbles that signal the perfect time to cook.
Is it true that the first pancake is always a failure?
No, this is a common misconception. The first pancake often fails only if the pan has not been adequately preheated to the correct cooking temperature, leading to uneven results.
Fluffy Pancakes From Scratch
Ingredients:
Instructions:
Nutrition Facts:
| Calories | 439 kcal |
|---|---|
| Protein | 10.9 g |
| Fat | 16.1 g |
| Carbs | 61.6 g |
| Fiber | 1.7 g |
| Sugar | 13.9 g |
| Sodium | 832 mg |
